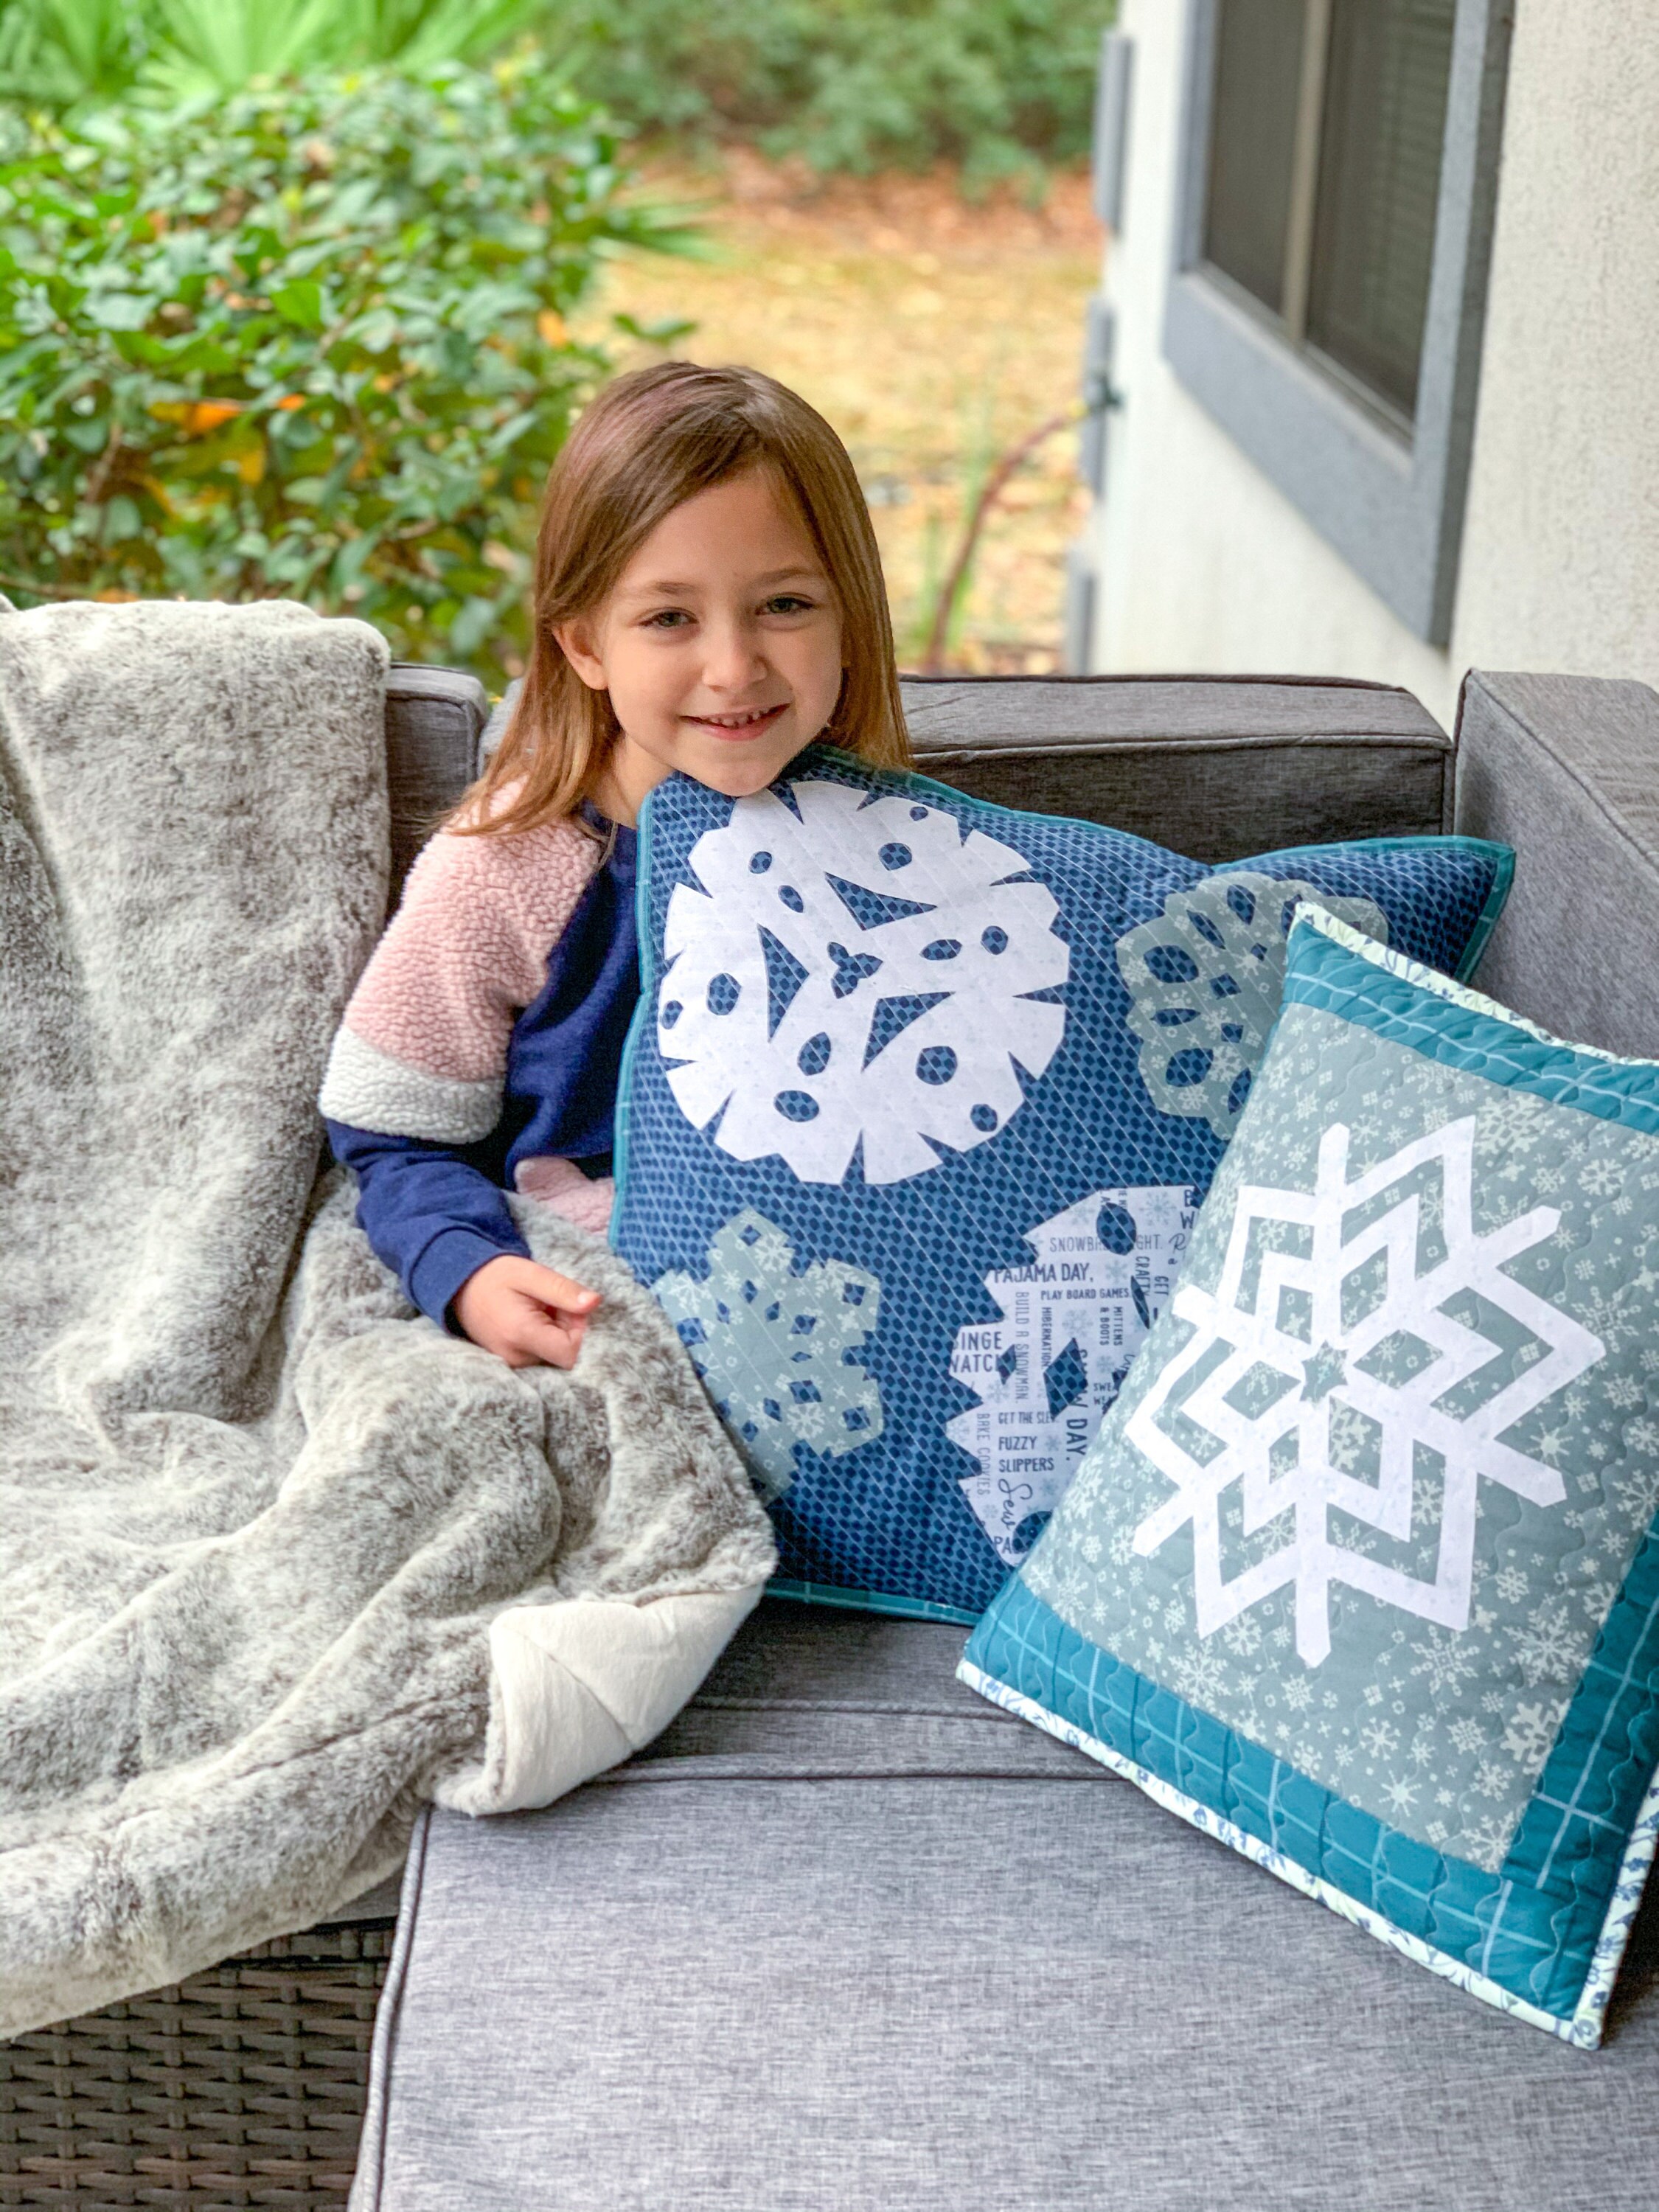
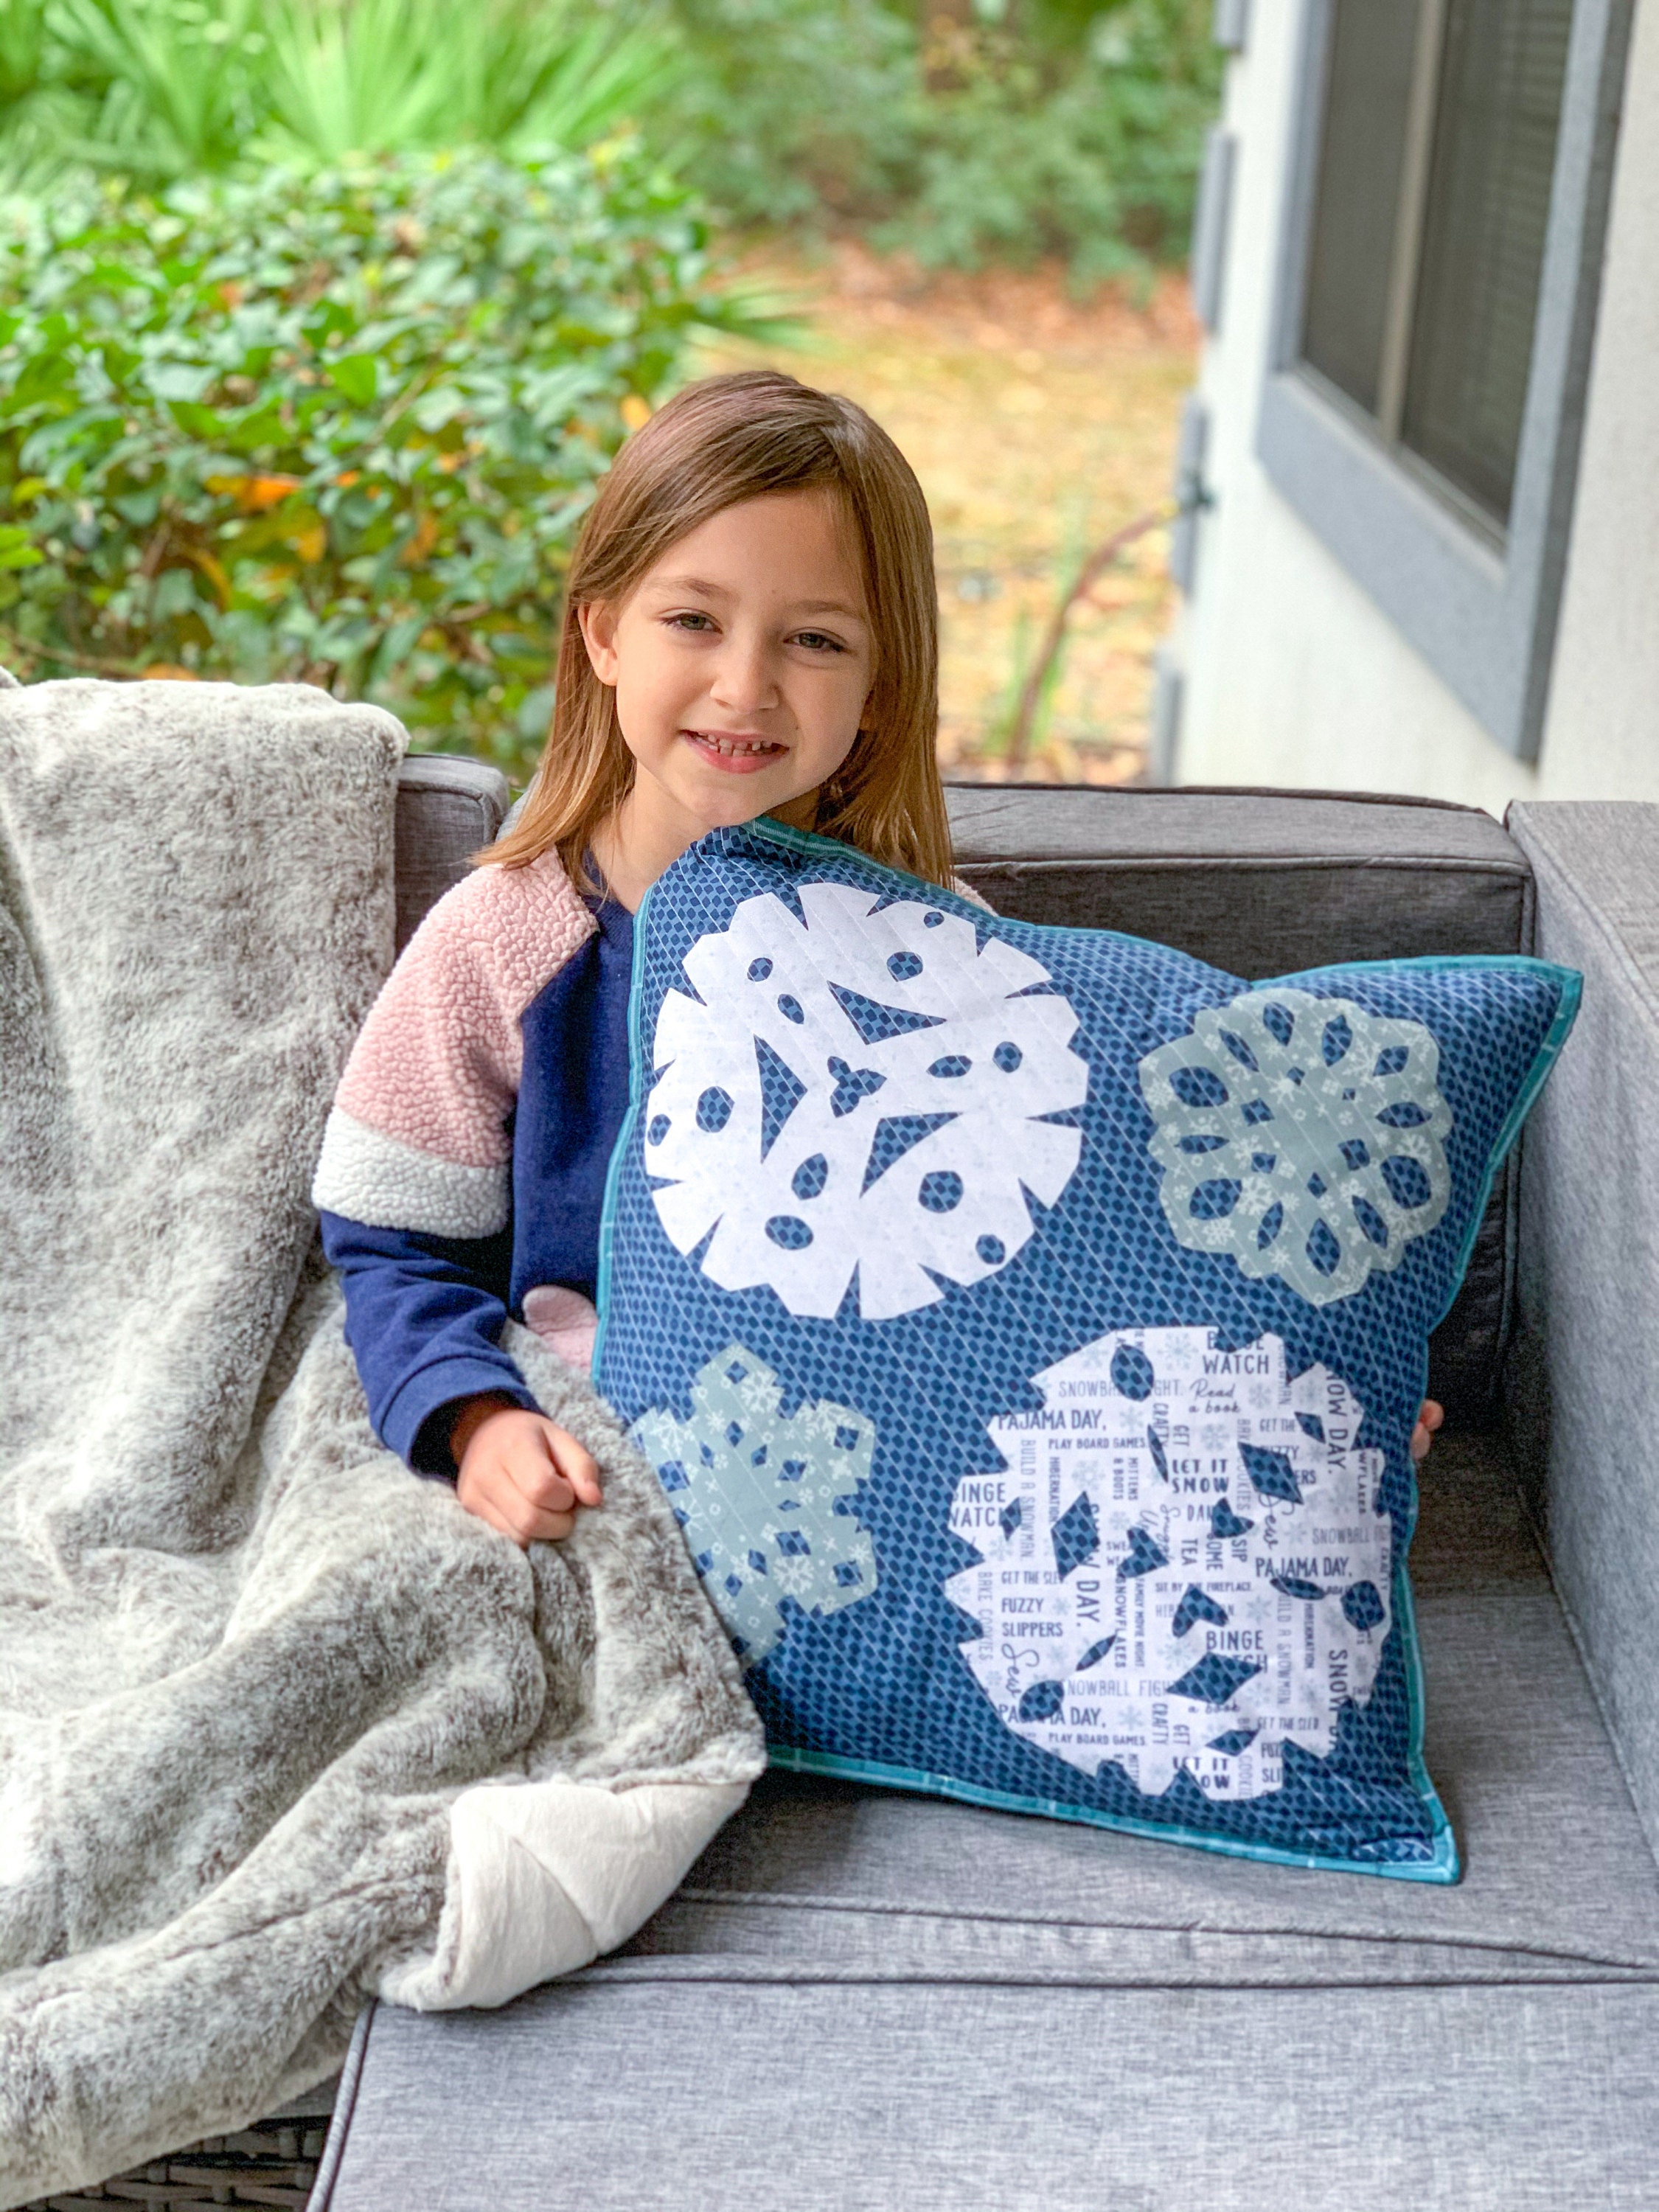
If you’ve been stuck... I mean... blessed to be at home with kids for the past 10 months, you’ll know this feel. As soon as I try to craft or make or do literally anything, I am inevitably bombarded with questions from a sweet, darling 6 year old who wants to have her hands in EVERYTHING I’m doing. Every sewing session eventually ends with me giving up on what I’m doing and instead helping her make something simpler and more fun for her. Don’t get me wrong, I’m grateful for her creativity and curiosity and I love helping her learn a new skill, I just haven’t been able to get many projects finished with such an enthusiastic helper always by my side.
I talked in an Instagram post about some of my reservations in participating in the Snow Day Project Party this time around. Besides my disinterest in keeping up with social media, I wasn’t sure that I’d have the time to complete a project. 2020 sure has been a whole new ballgame... (sigh.) But then I came up with an idea for a project my 6 year old and I could do together! So we busted up our winter break boredom by making these Paper Snowflake Pillows!
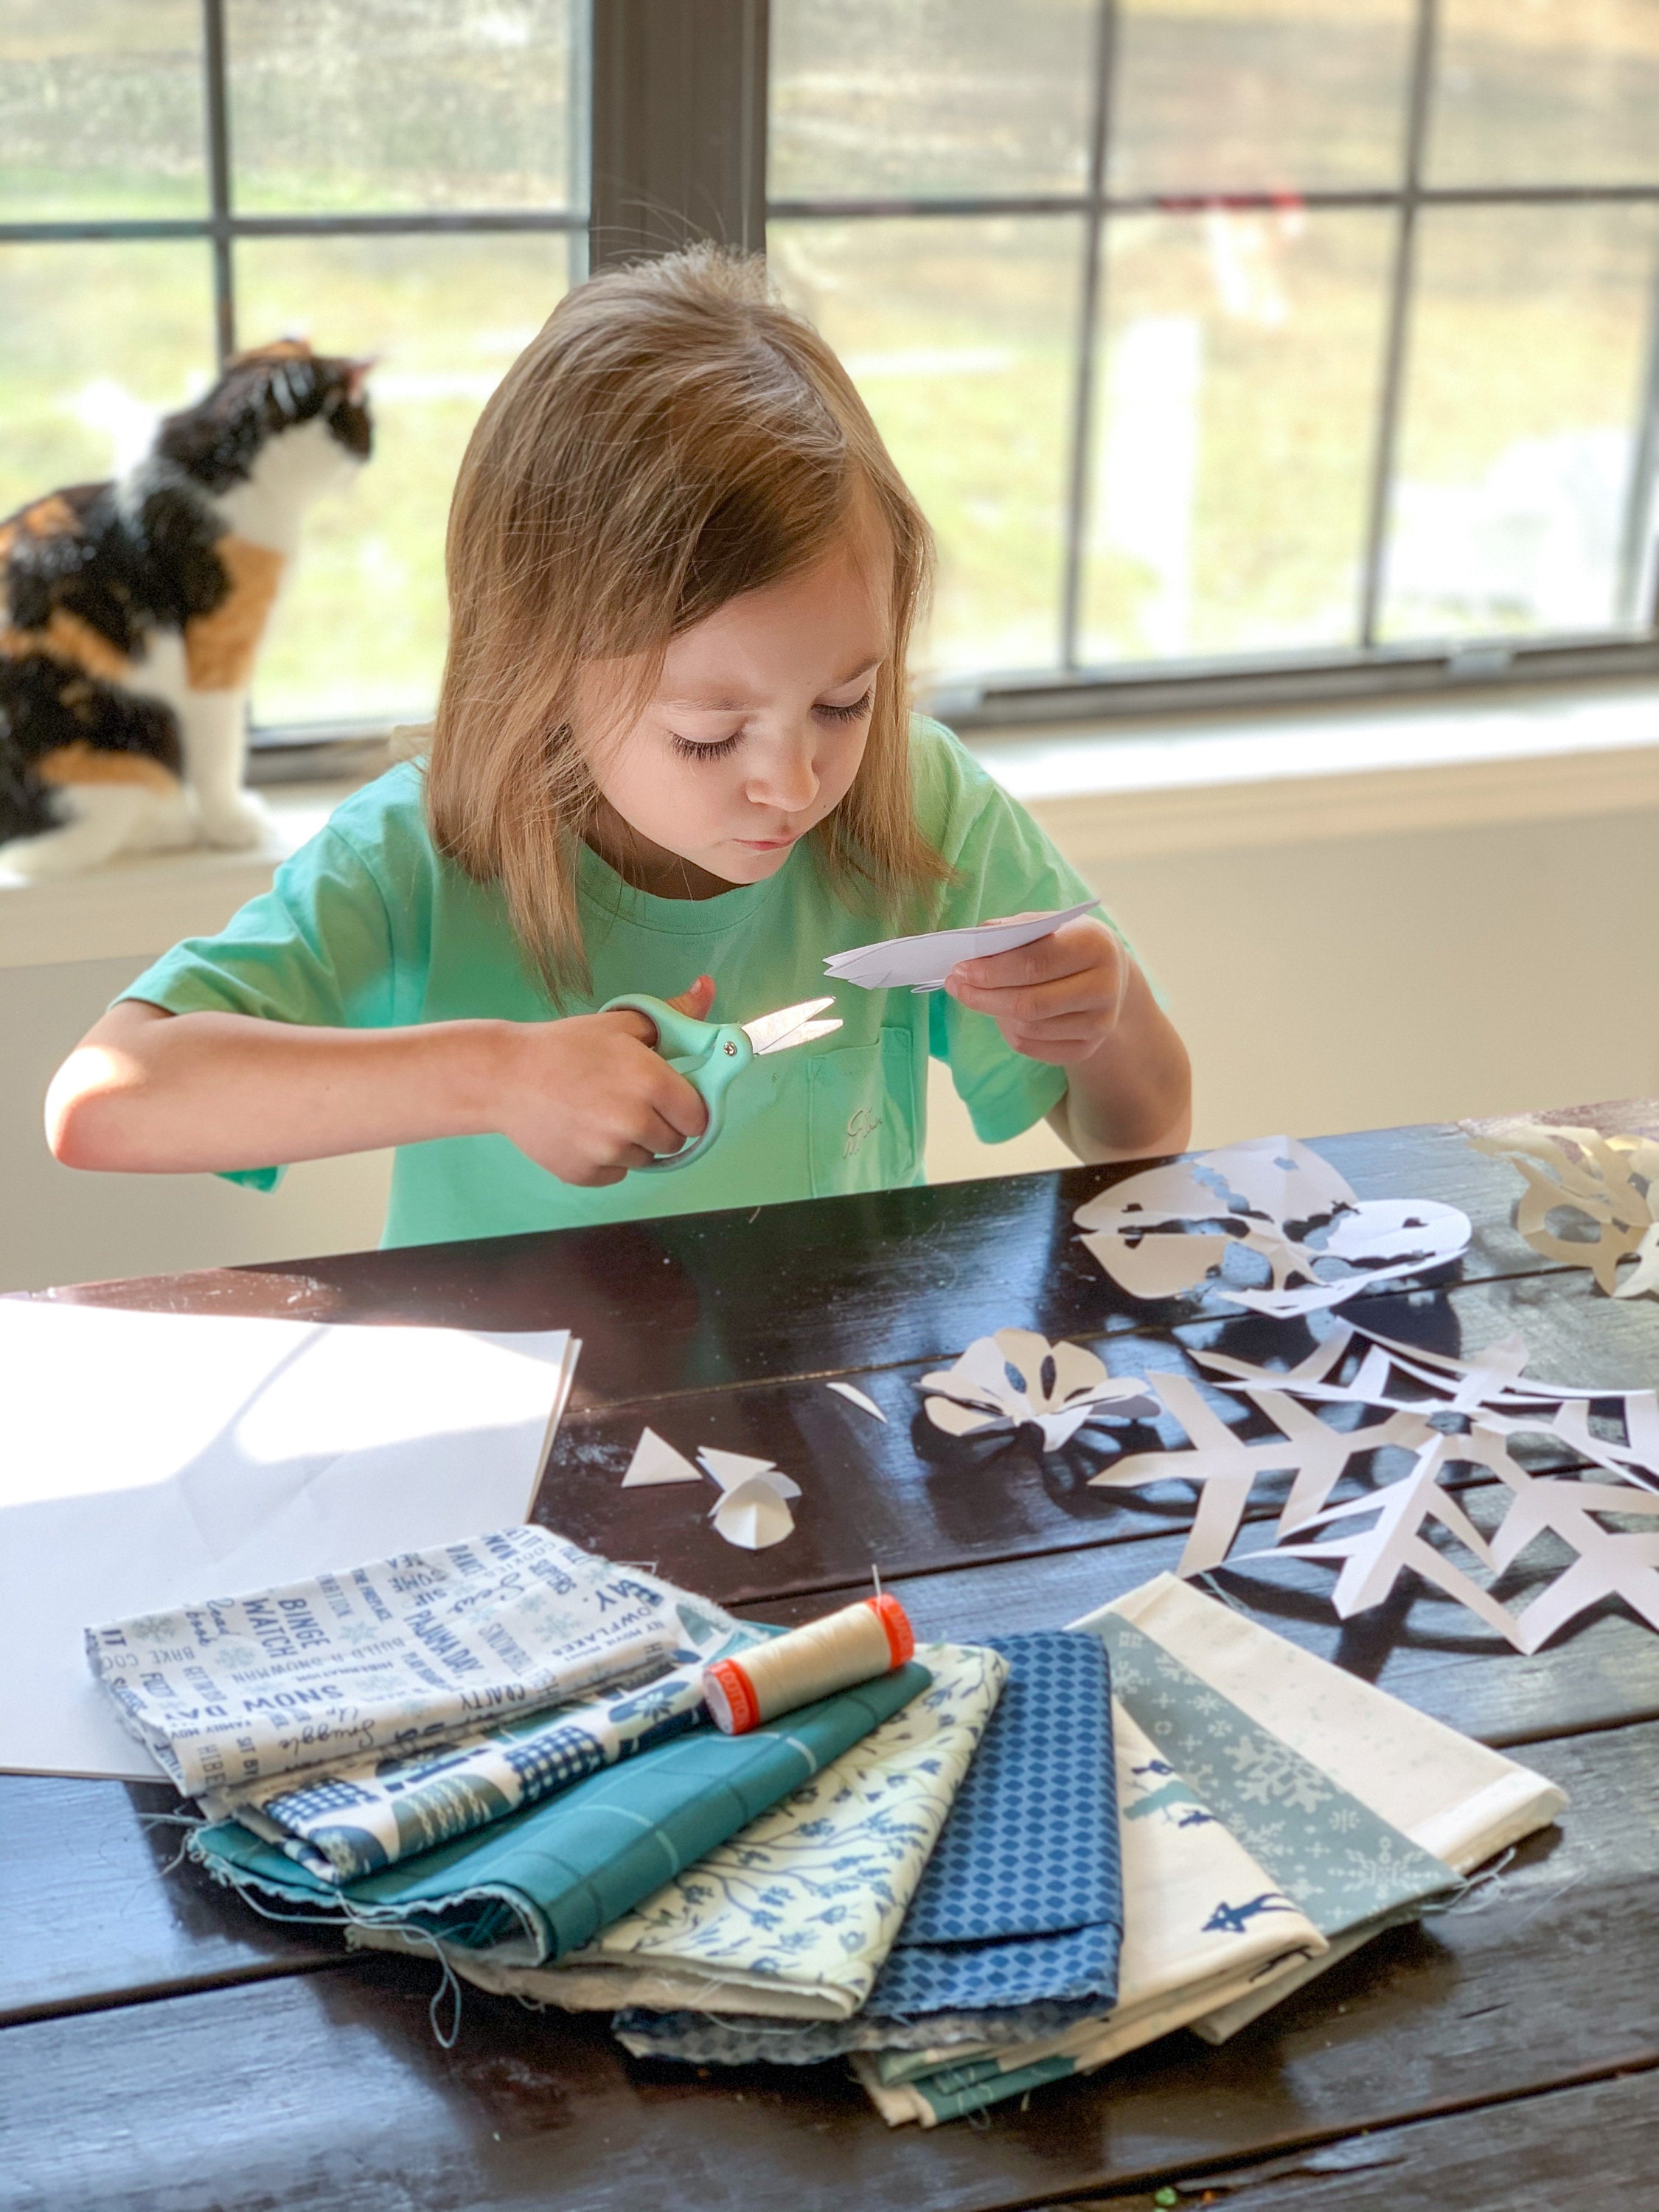
Remember being a kid and folding up every piece of paper you could get your hands on and then making little cuts in it so that when it was unfolded it looked like a snowflake? Surely that wasn’t just me. Well, I thought, why not apply the same concept to fabric?? First, we practiced making our snowflakes on paper. It did take a few tries to remember the best way to fold it and figure out what looked good. Pinterest was a big help! (Search “paper snowflake template” for lots of good tips.)
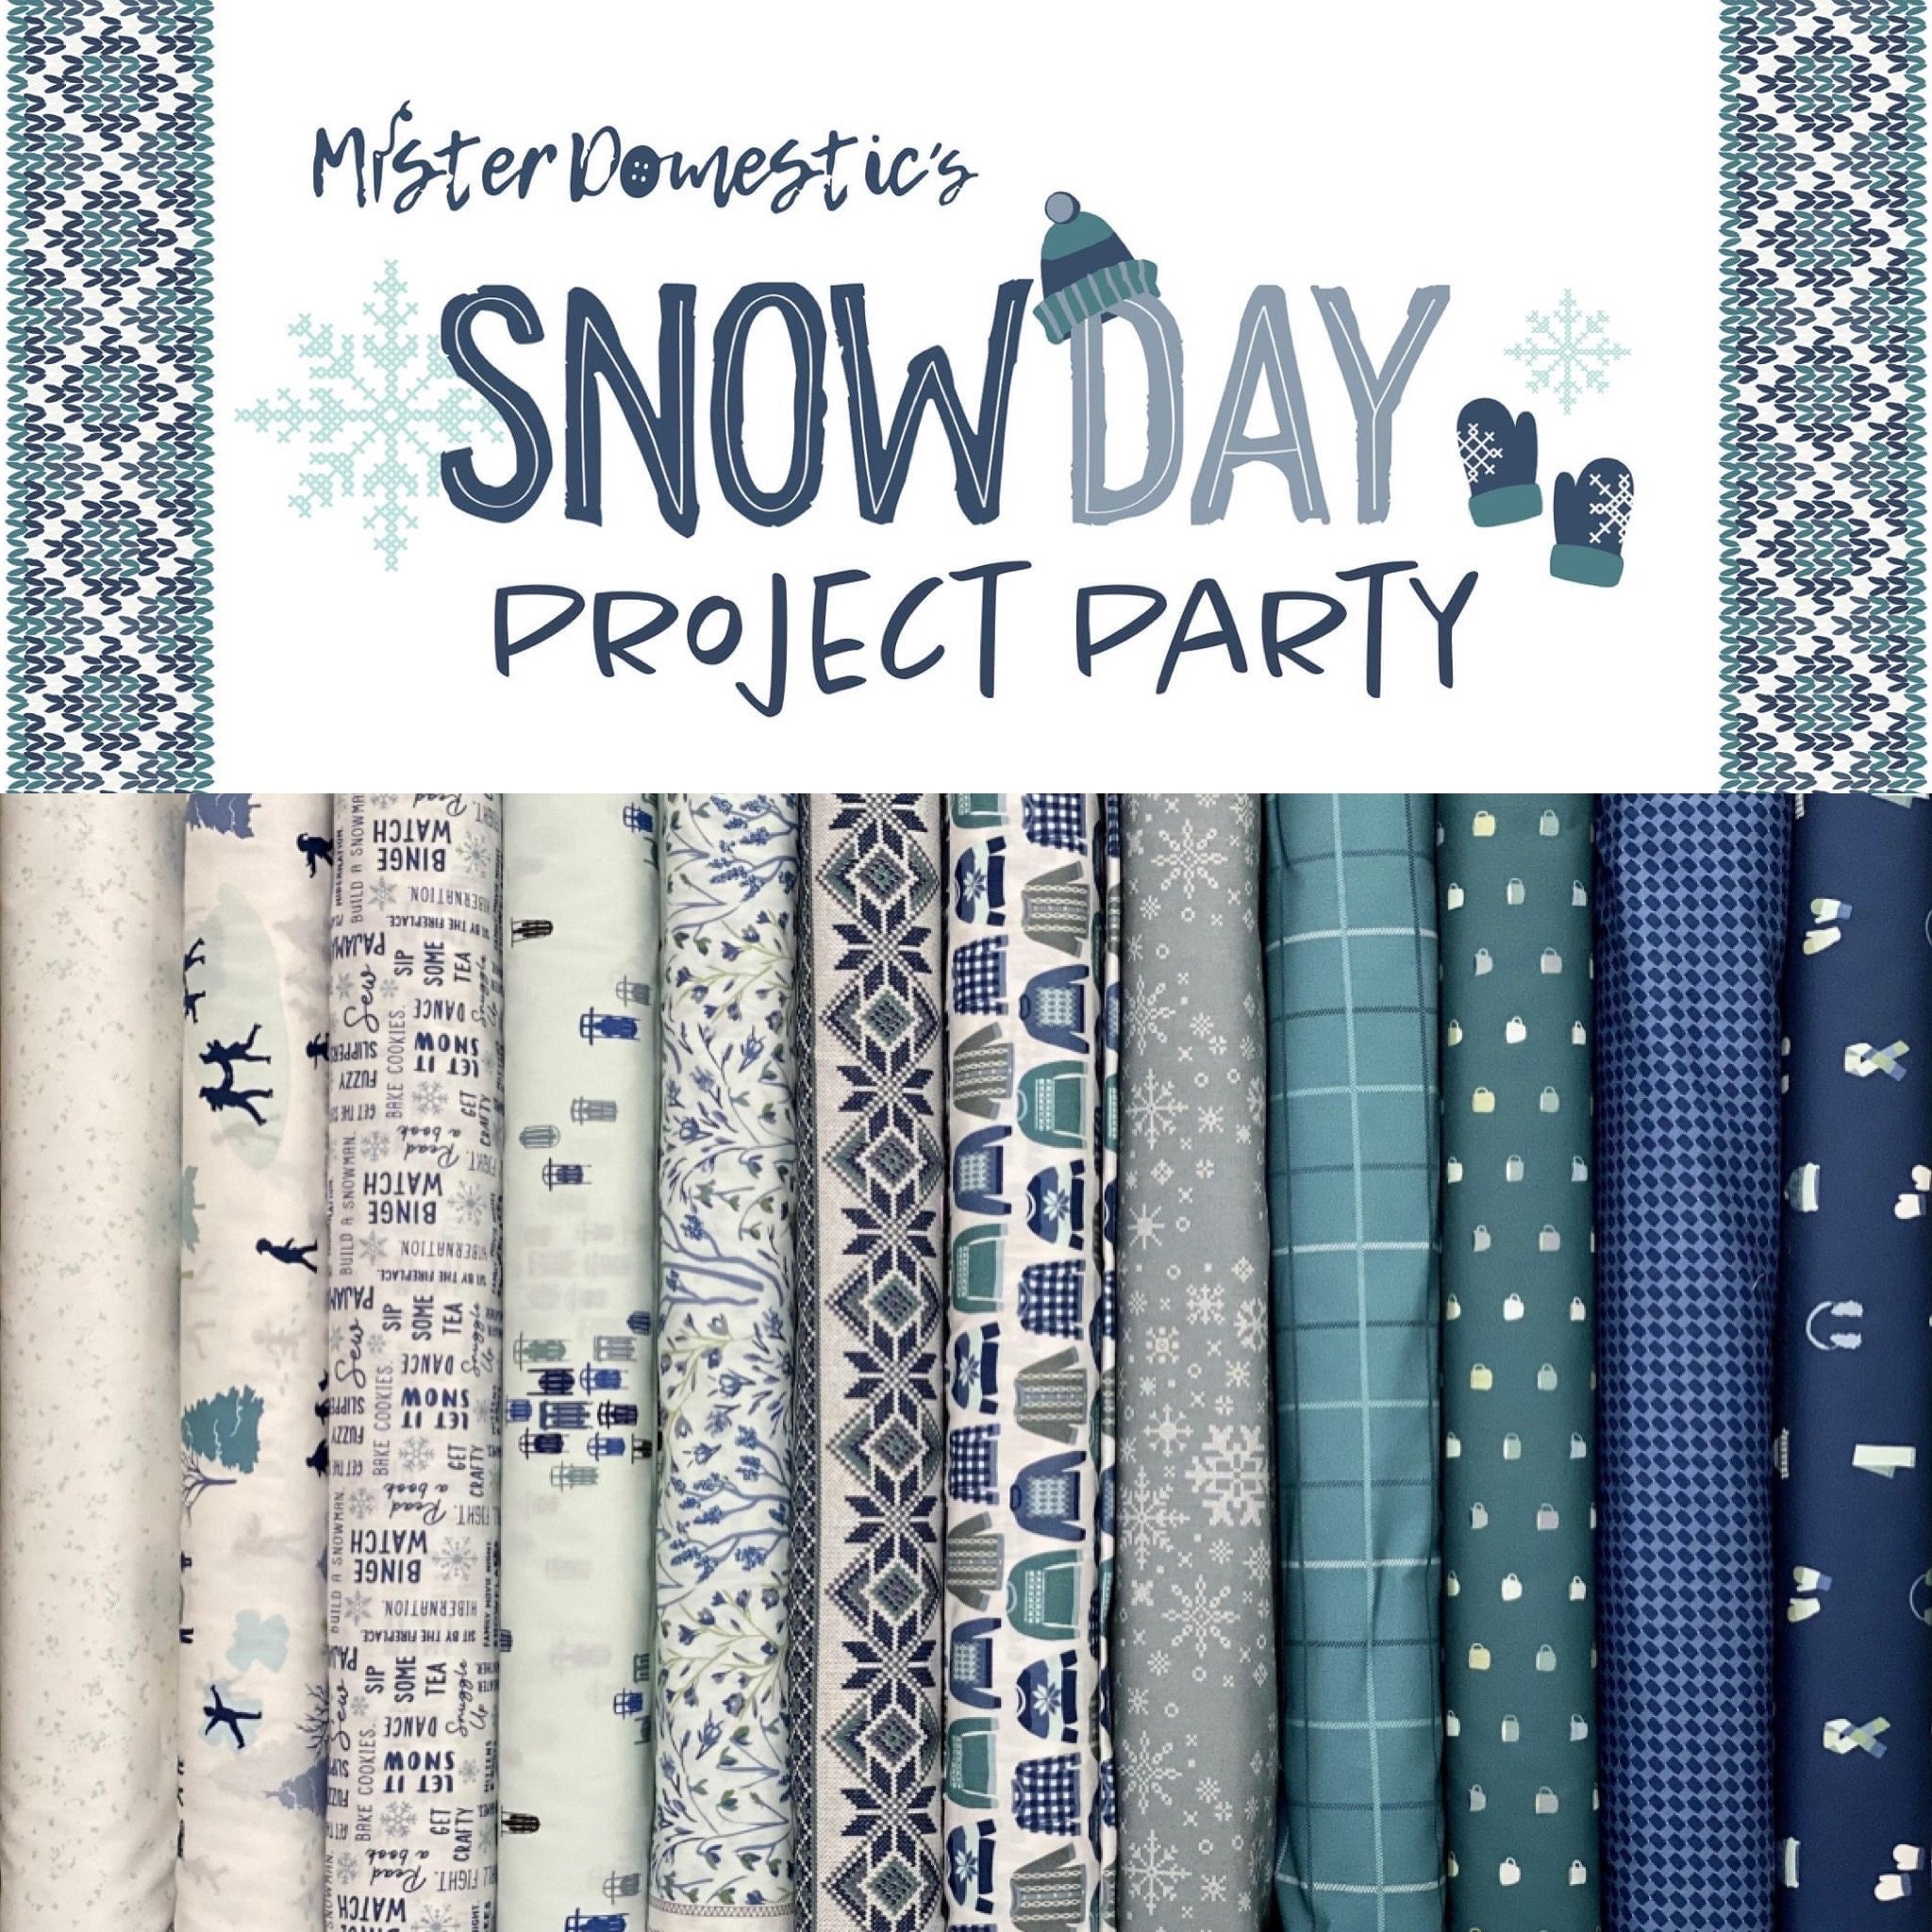
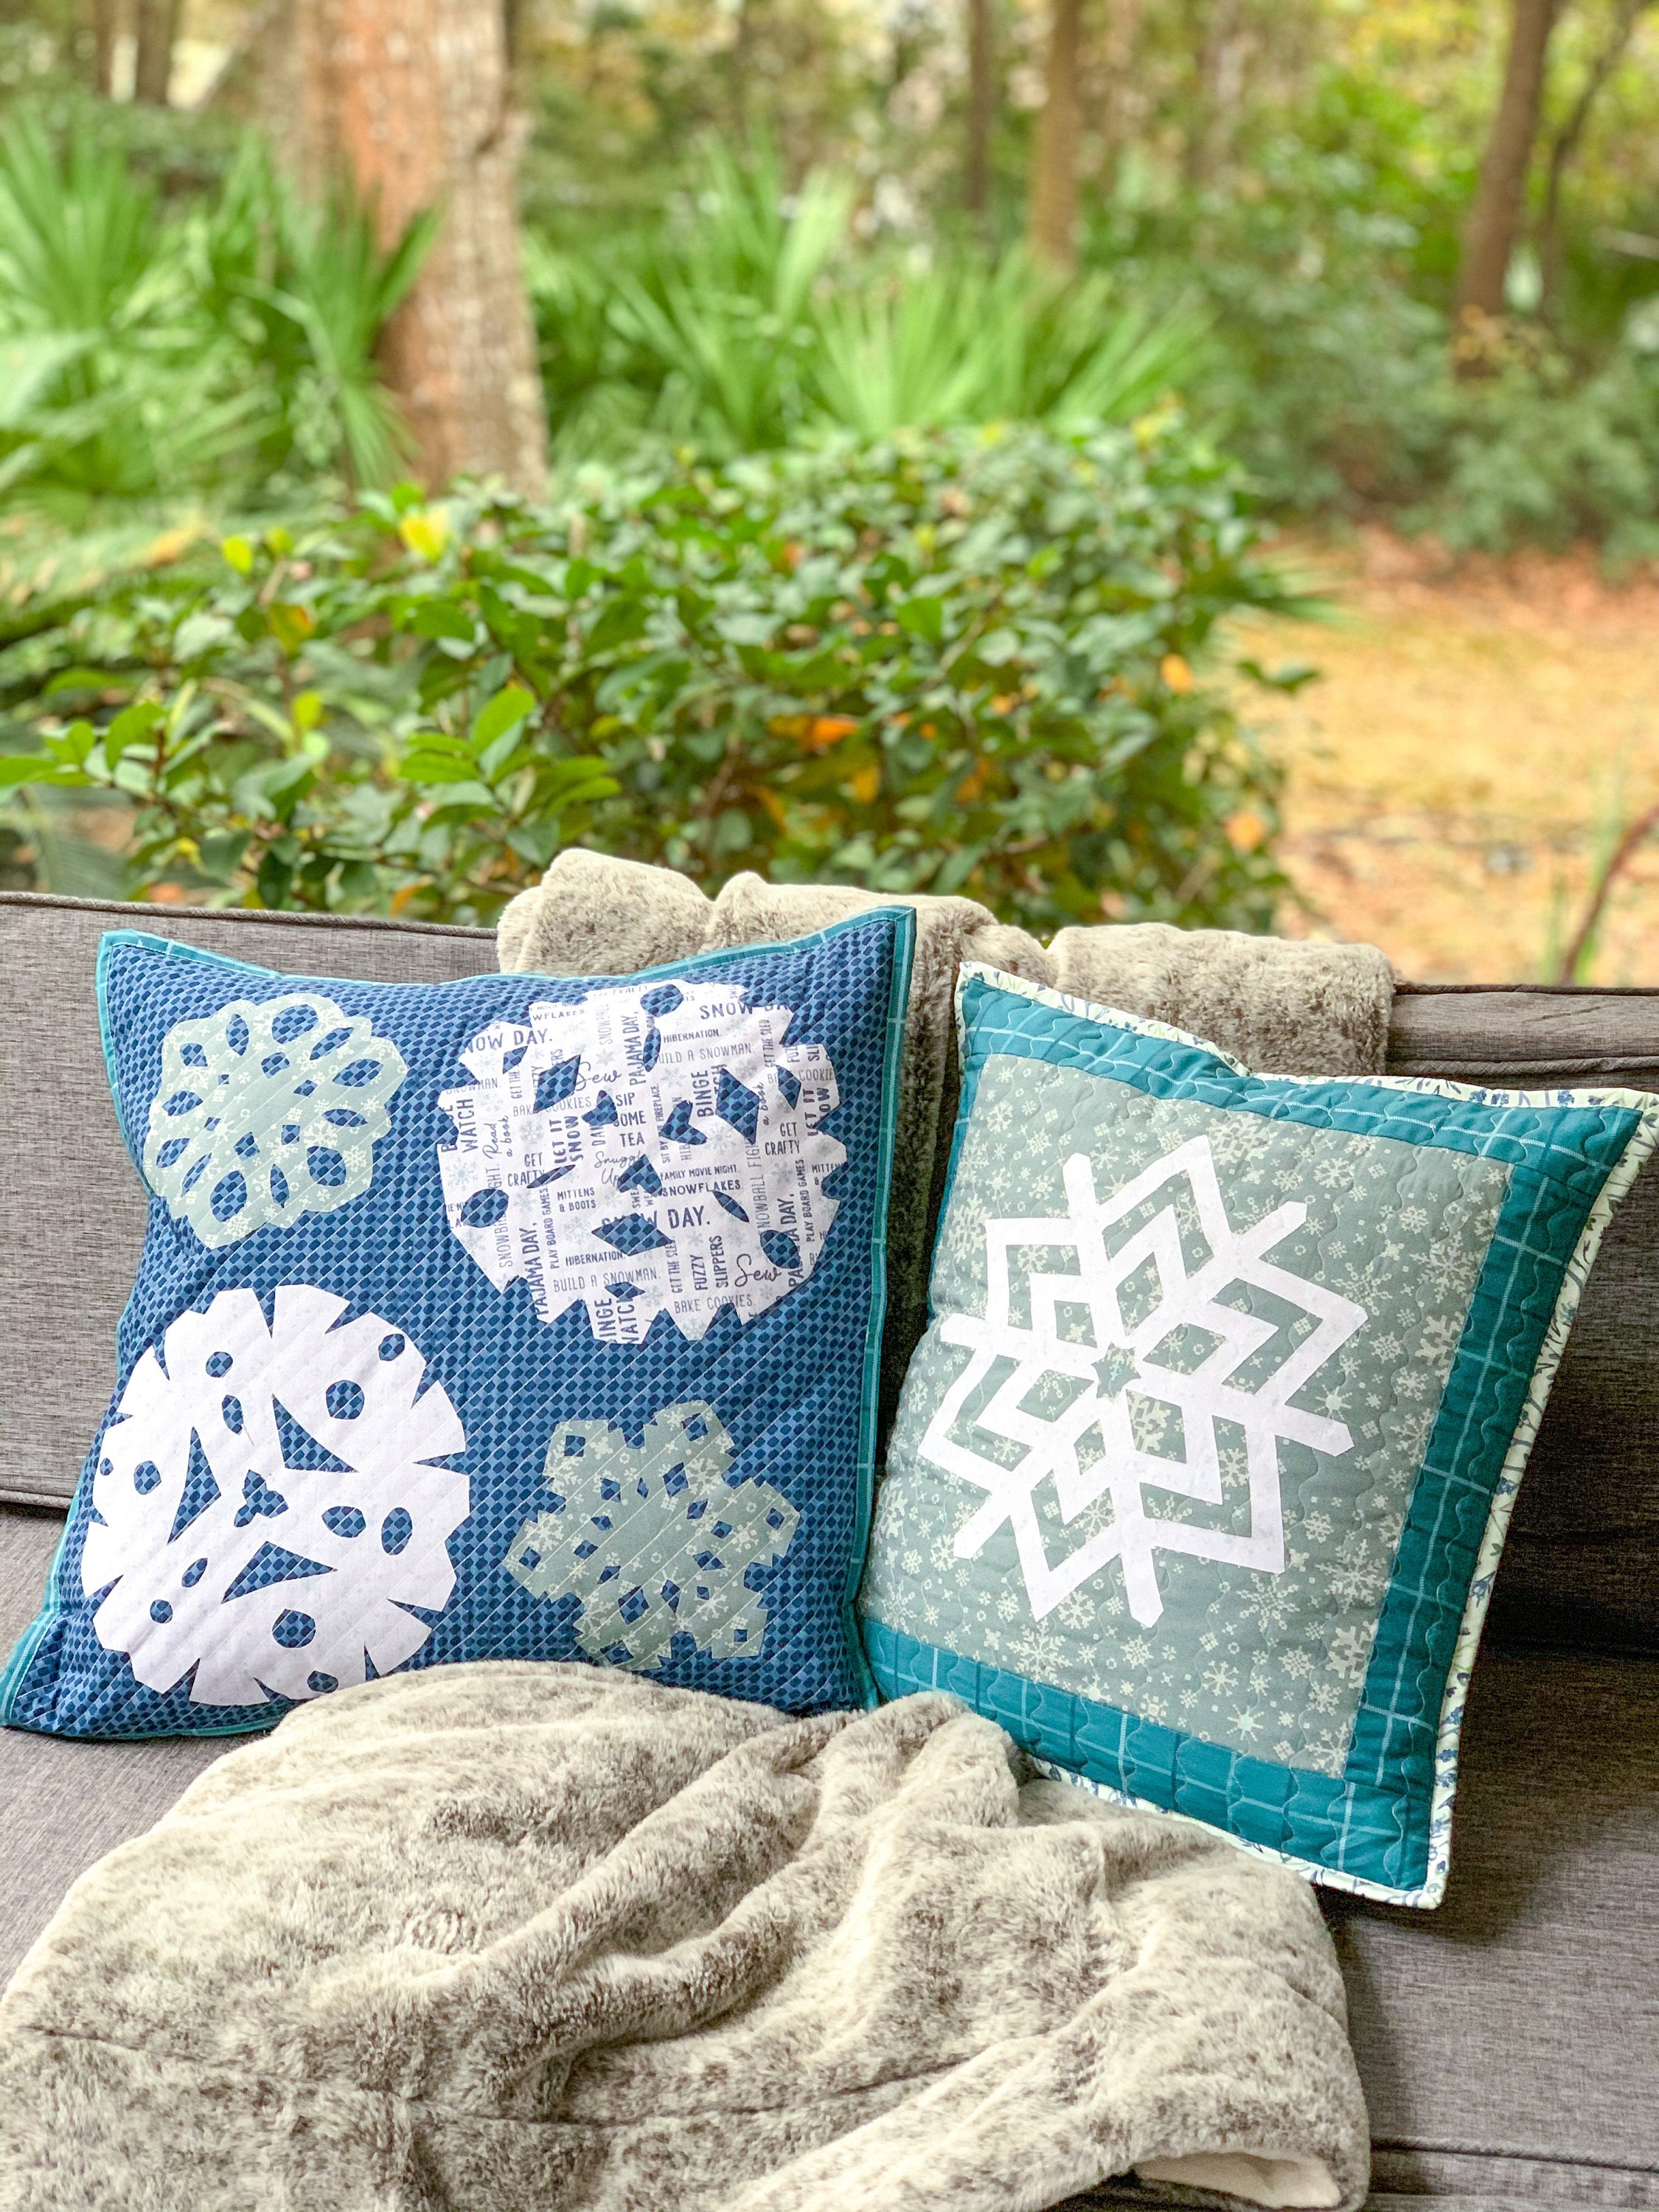
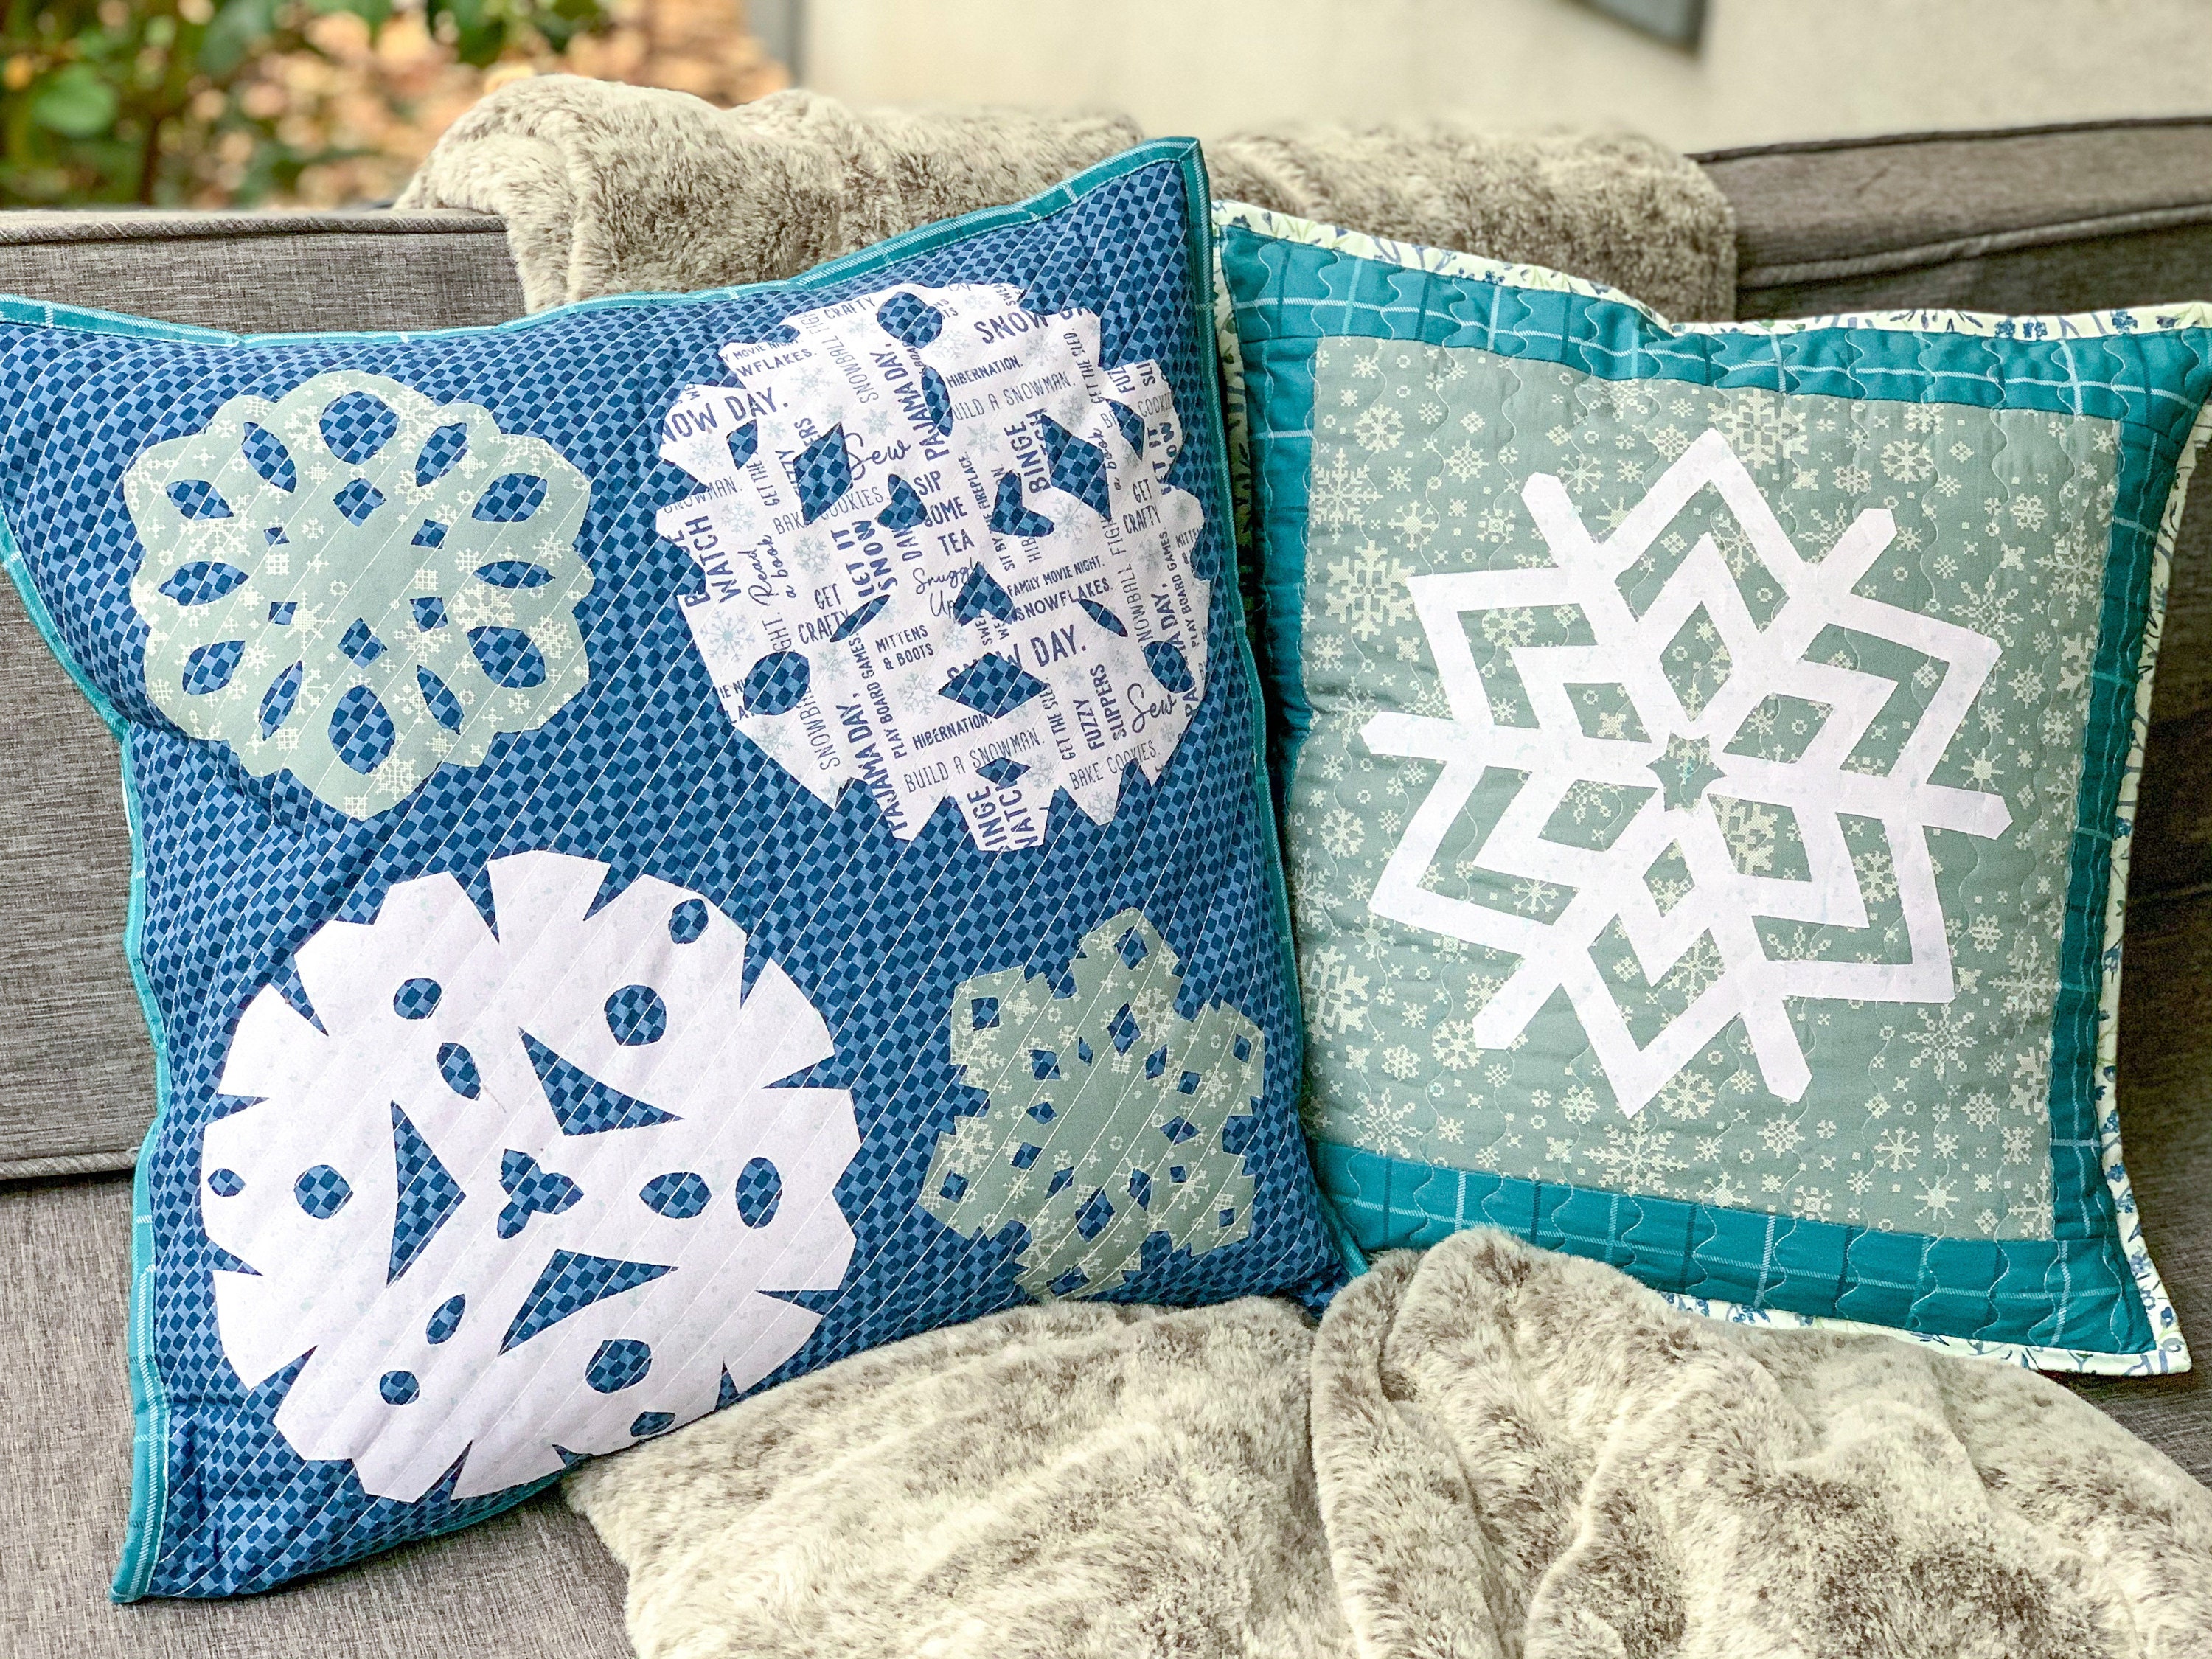
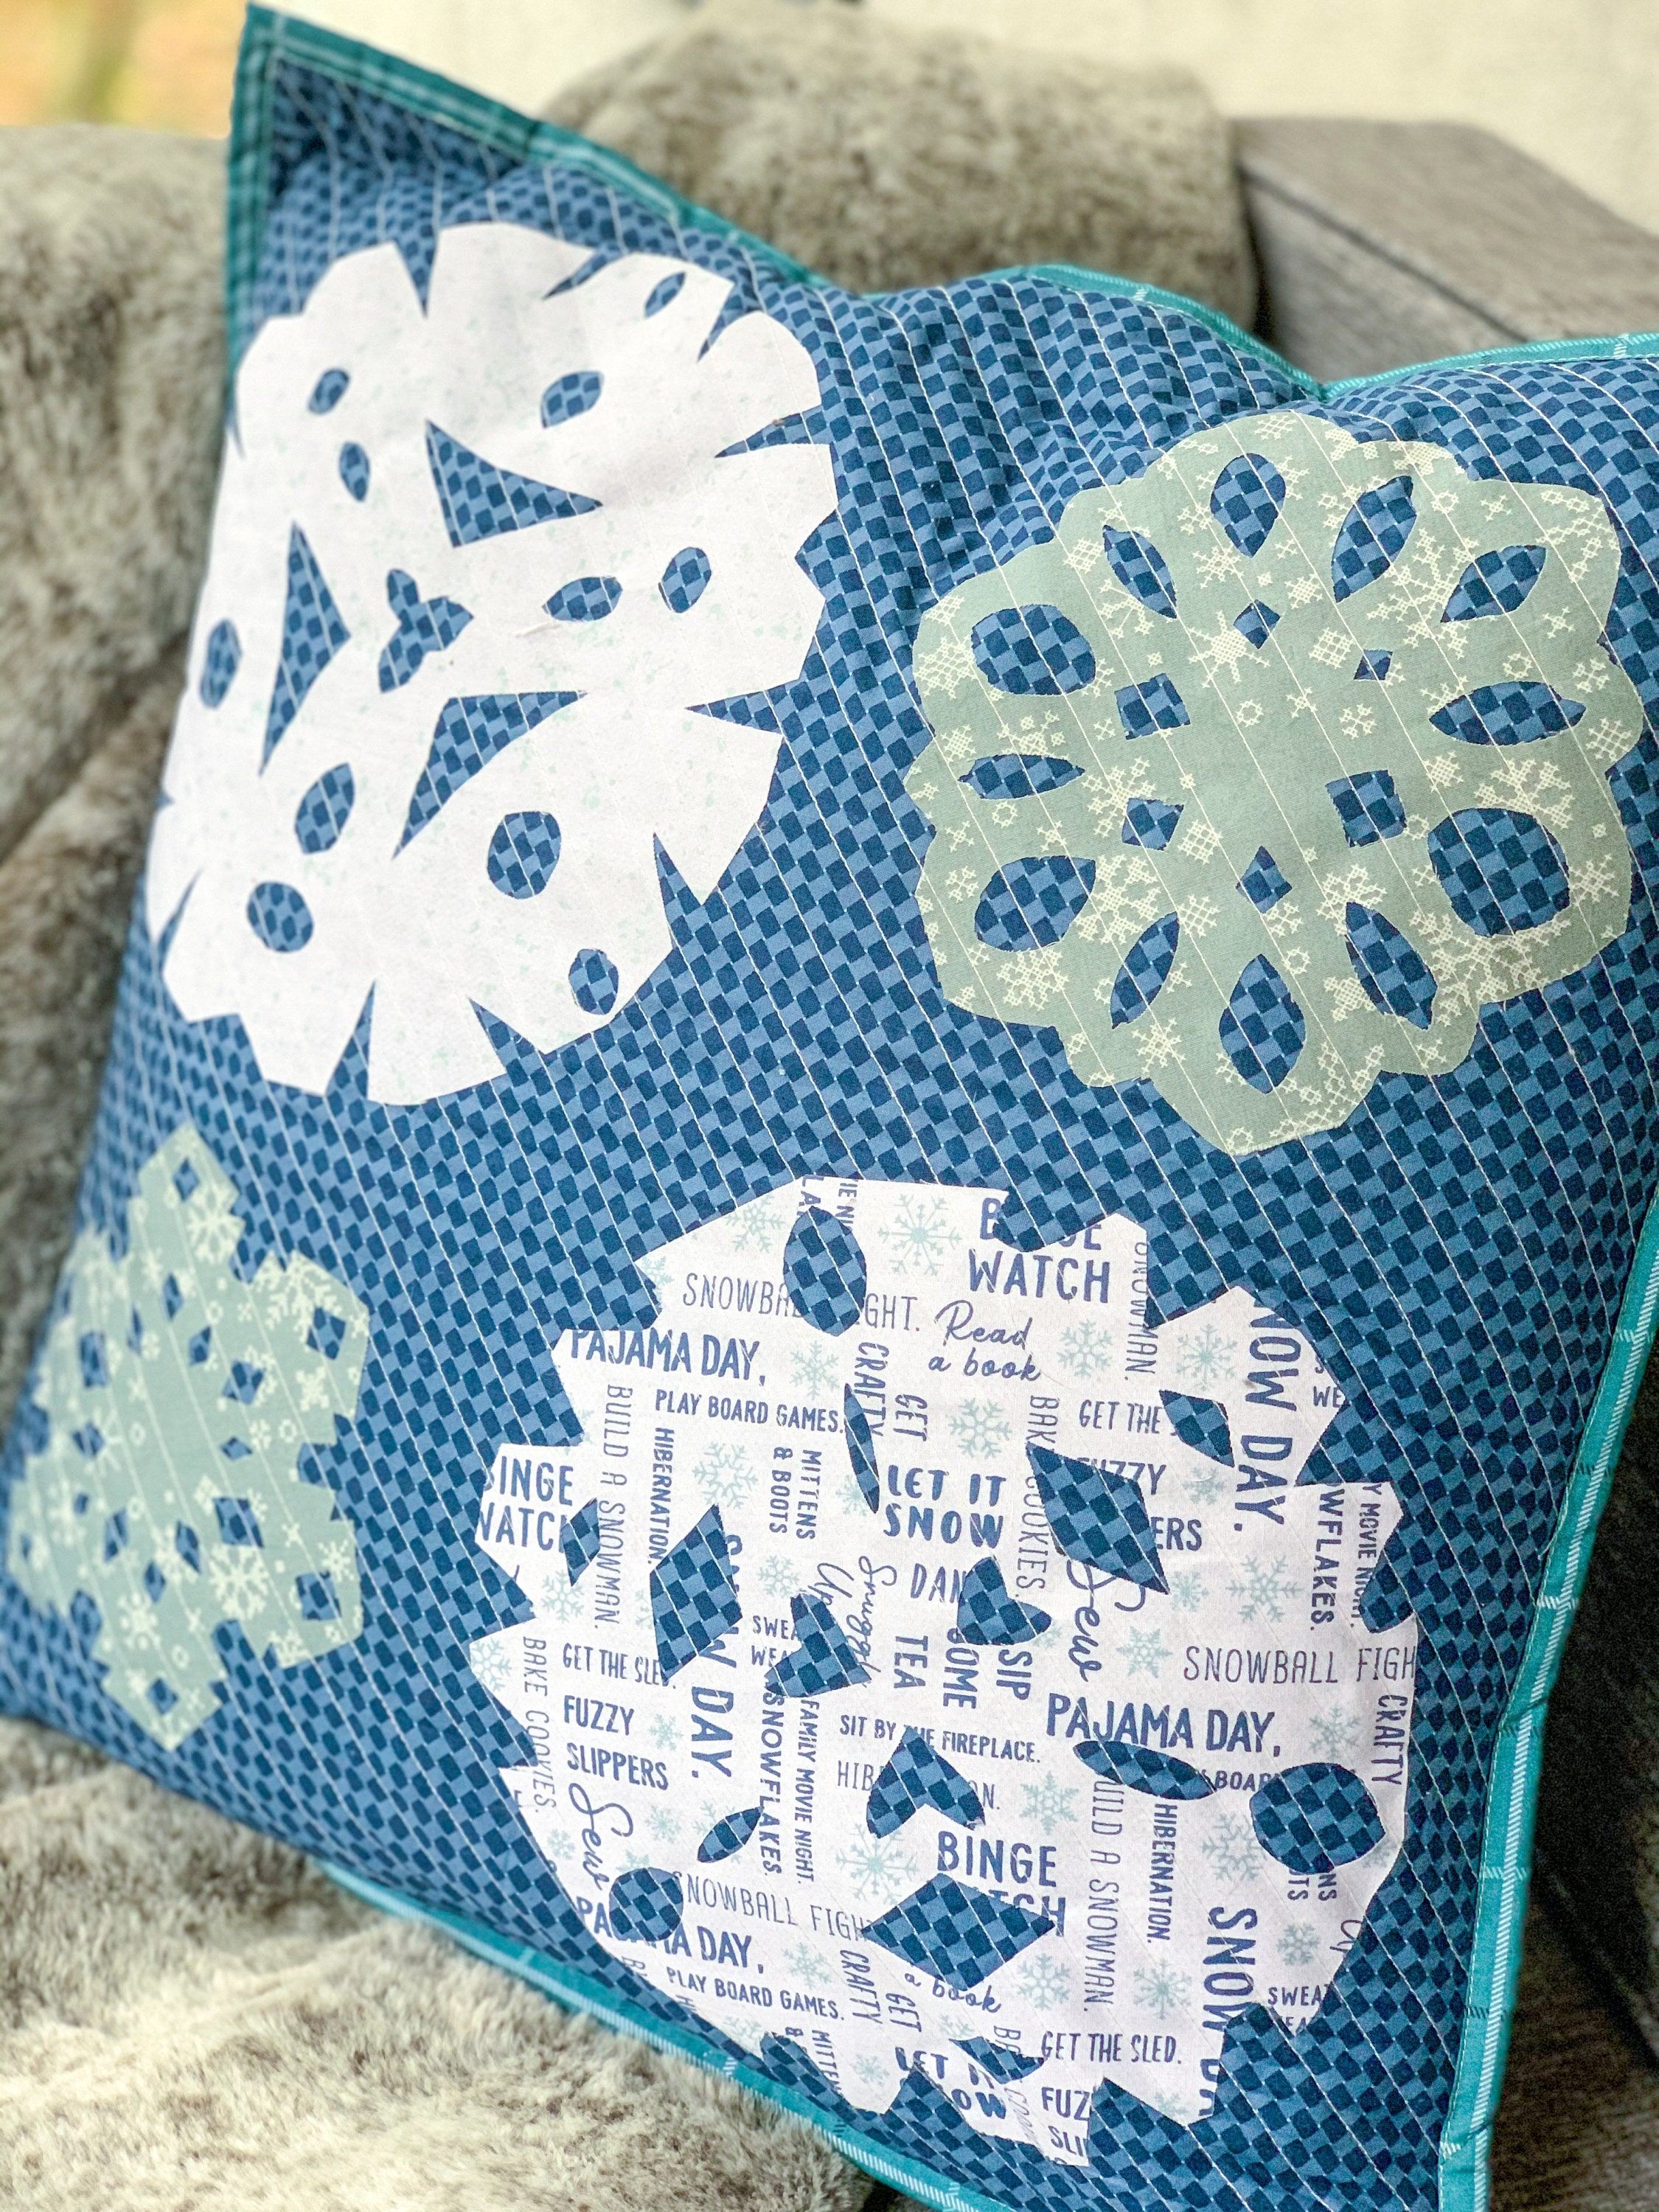
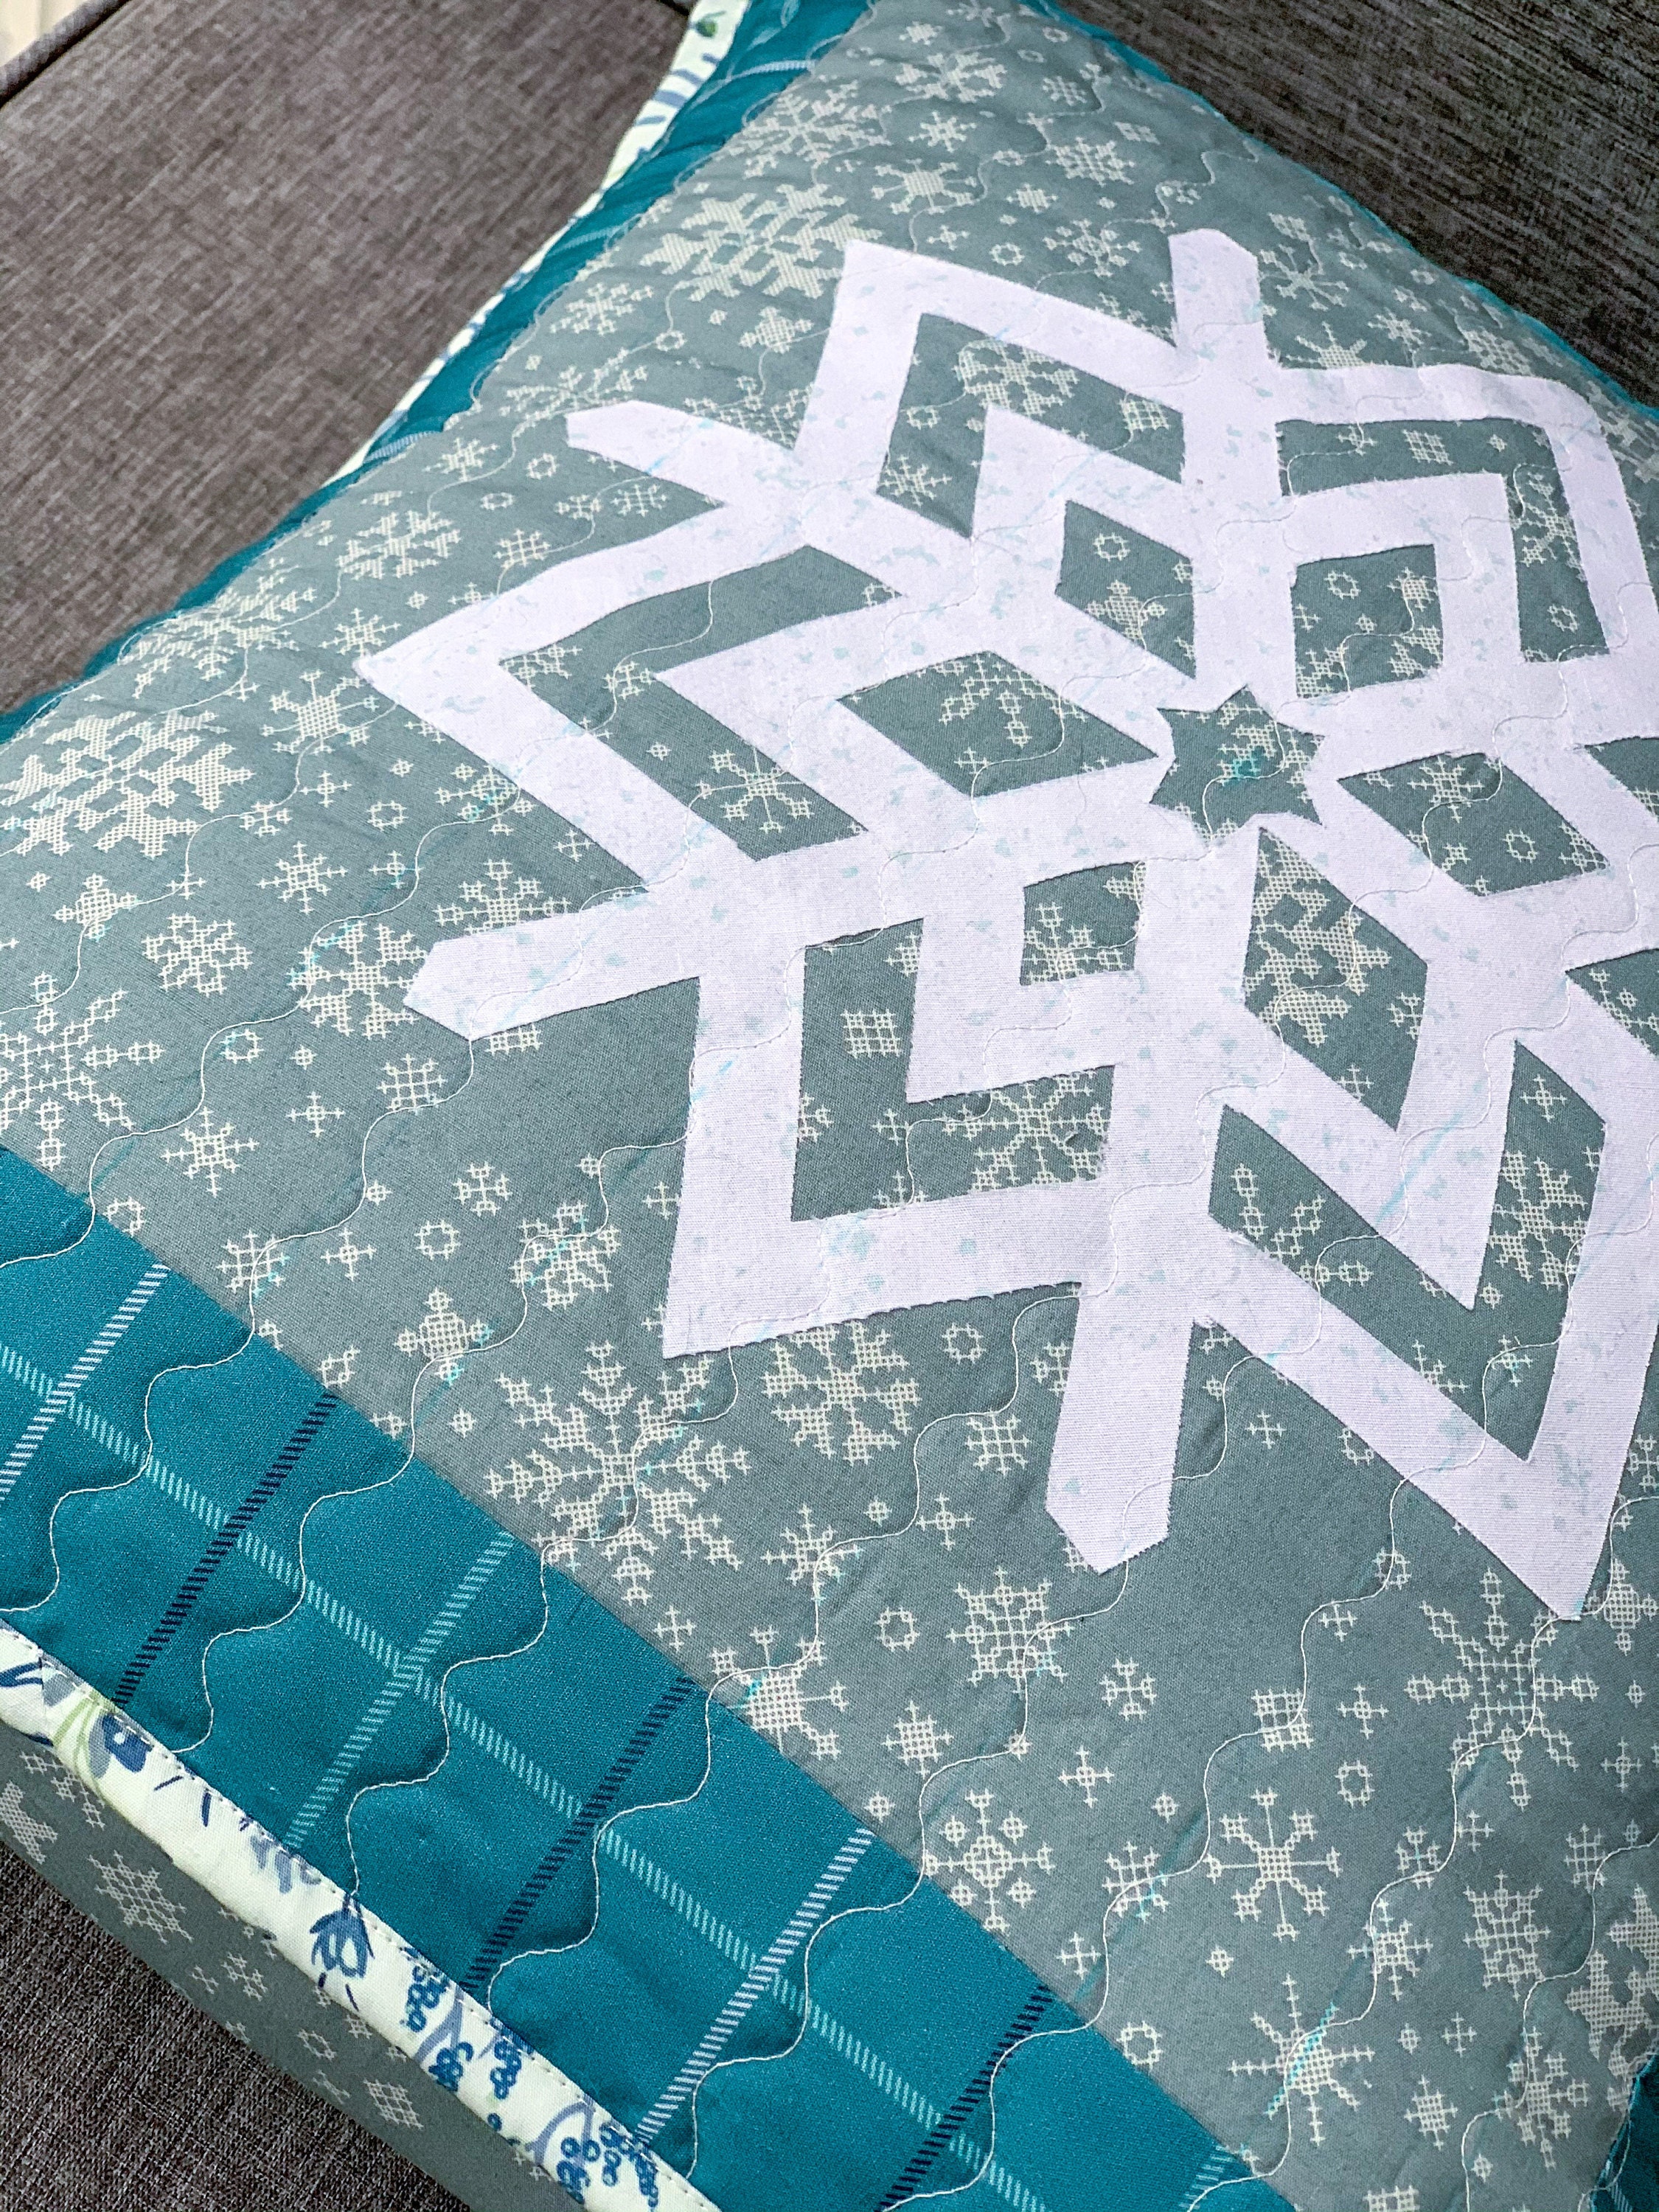
Once we had chosen our best snowflakes, we picked our fabrics from Mister Domestic’s Snow Day collection by Art Gallery Fabrics. Phoebe chose the Cuddled Up print for her background, and the Let It Snow, Ice Crystals and Snowbound prints for her snowflakes. I chose the Ice Crystals and Wintery Check Soft prints for my background and the Let It Snow print for my snowflake. If you haven’t used Art Gallery Fabrics before, you are missing out! They are so soft and an absolute dream to work with.
We started by cutting some squares for our snowflakes. On Phoebe’s pillow, we used 8.5” squares for the larger snowflakes and 6” squares for the smaller ones. On my pillow I used a 9.5” square. I then cut the same size squares out of Heat & Bond and ironed one side onto the back side of the fabric. Make sure you do not peel off the paper backing once attached to the fabric! It will make it much easier to cut out the snowflakes with the backing still attached.
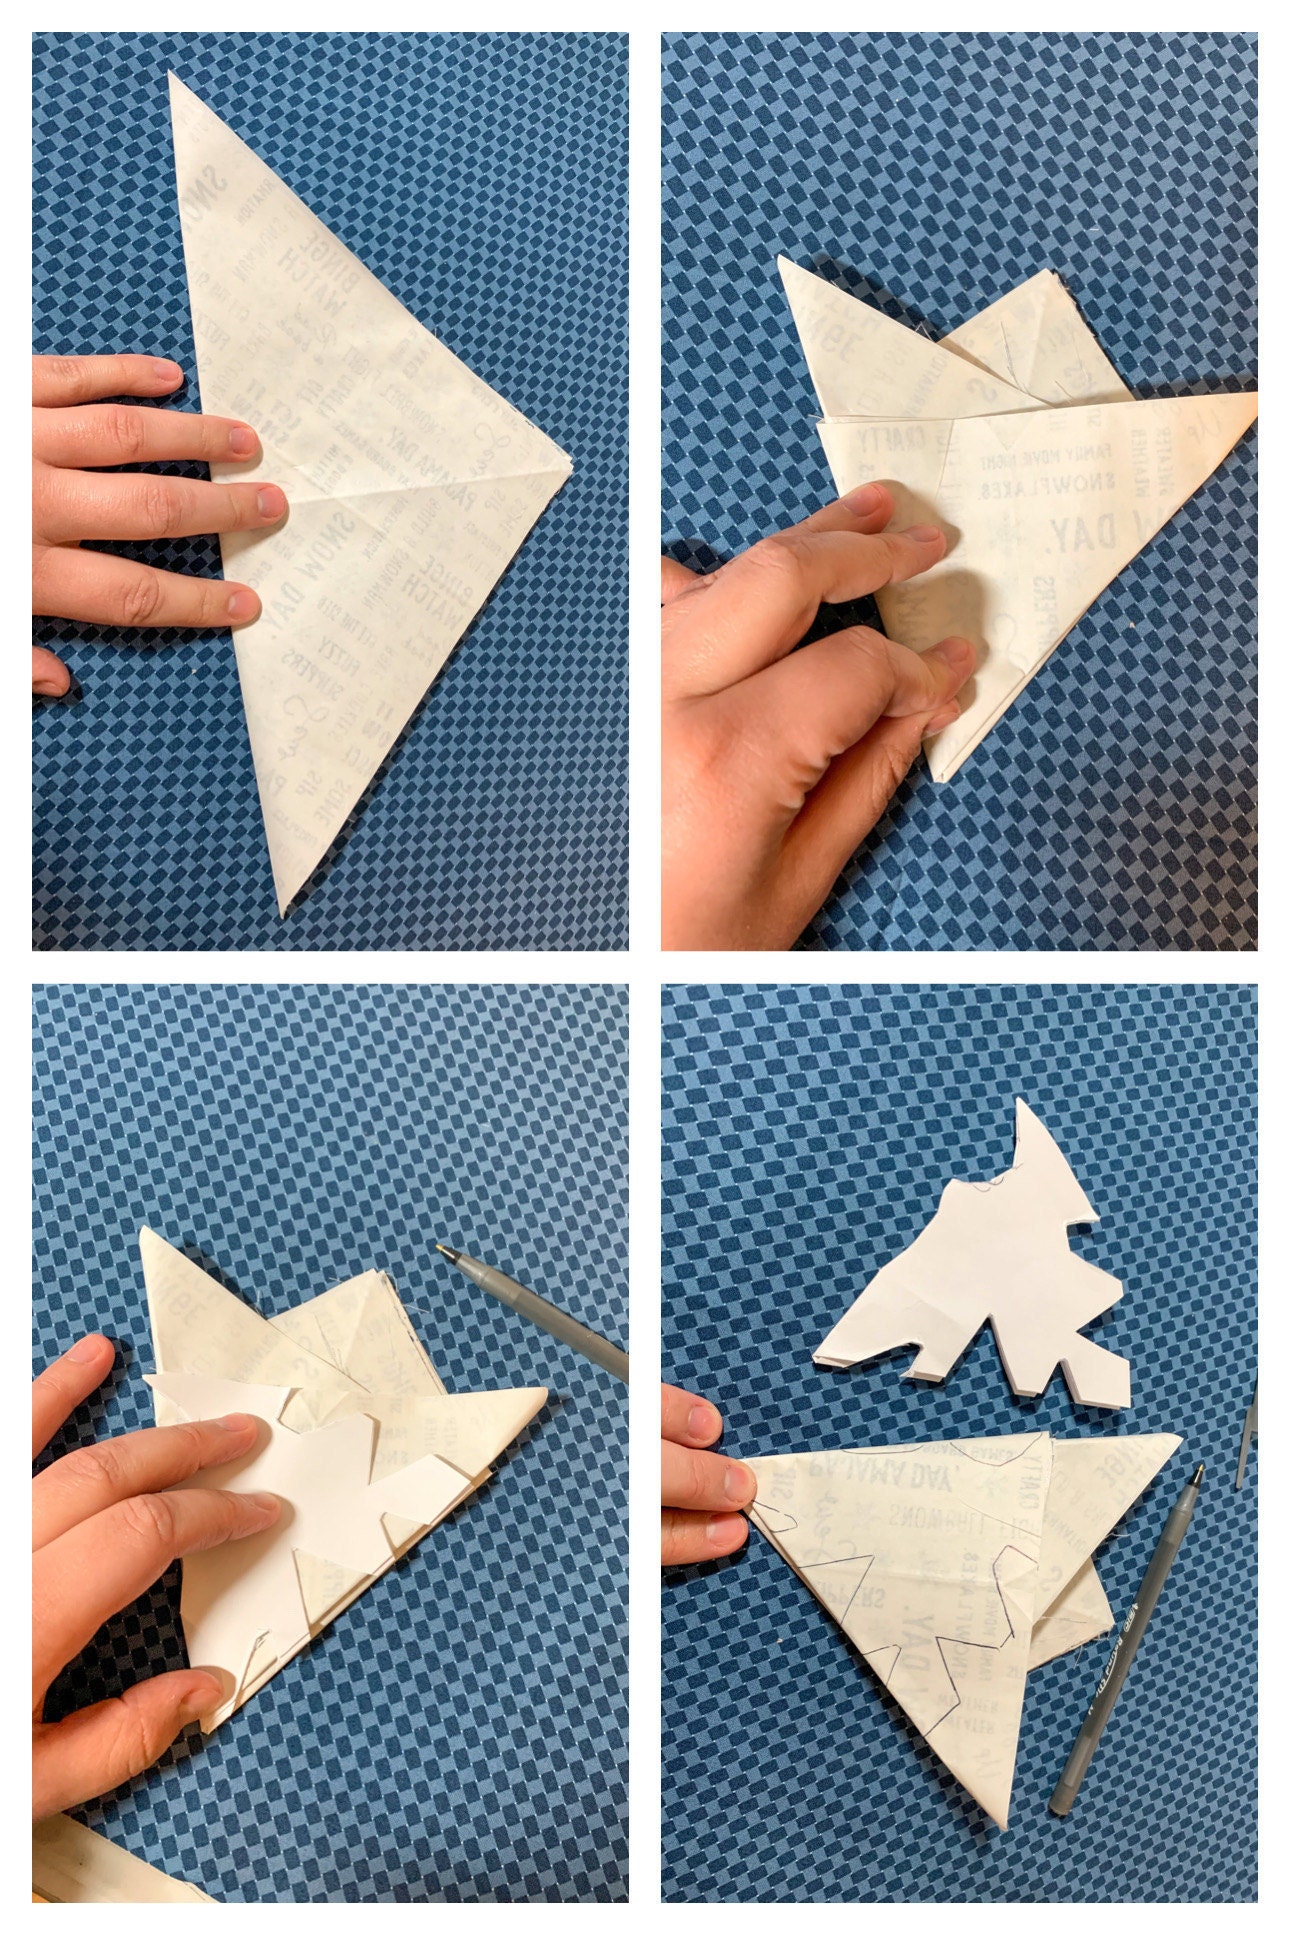
Now, fold and cut your snowflakes. There is no wrong way to do this! I found the best way to fold was to fold my square in half diagonally, and then fold that triangle in thirds. We used our already cut out paper snowflakes as templates and traced the cut marks onto the paper side of the heat and bond before cutting. I used scissors for cutting, but I found an exacto knife to be extremely helpful in cutting the points through all of the layers.
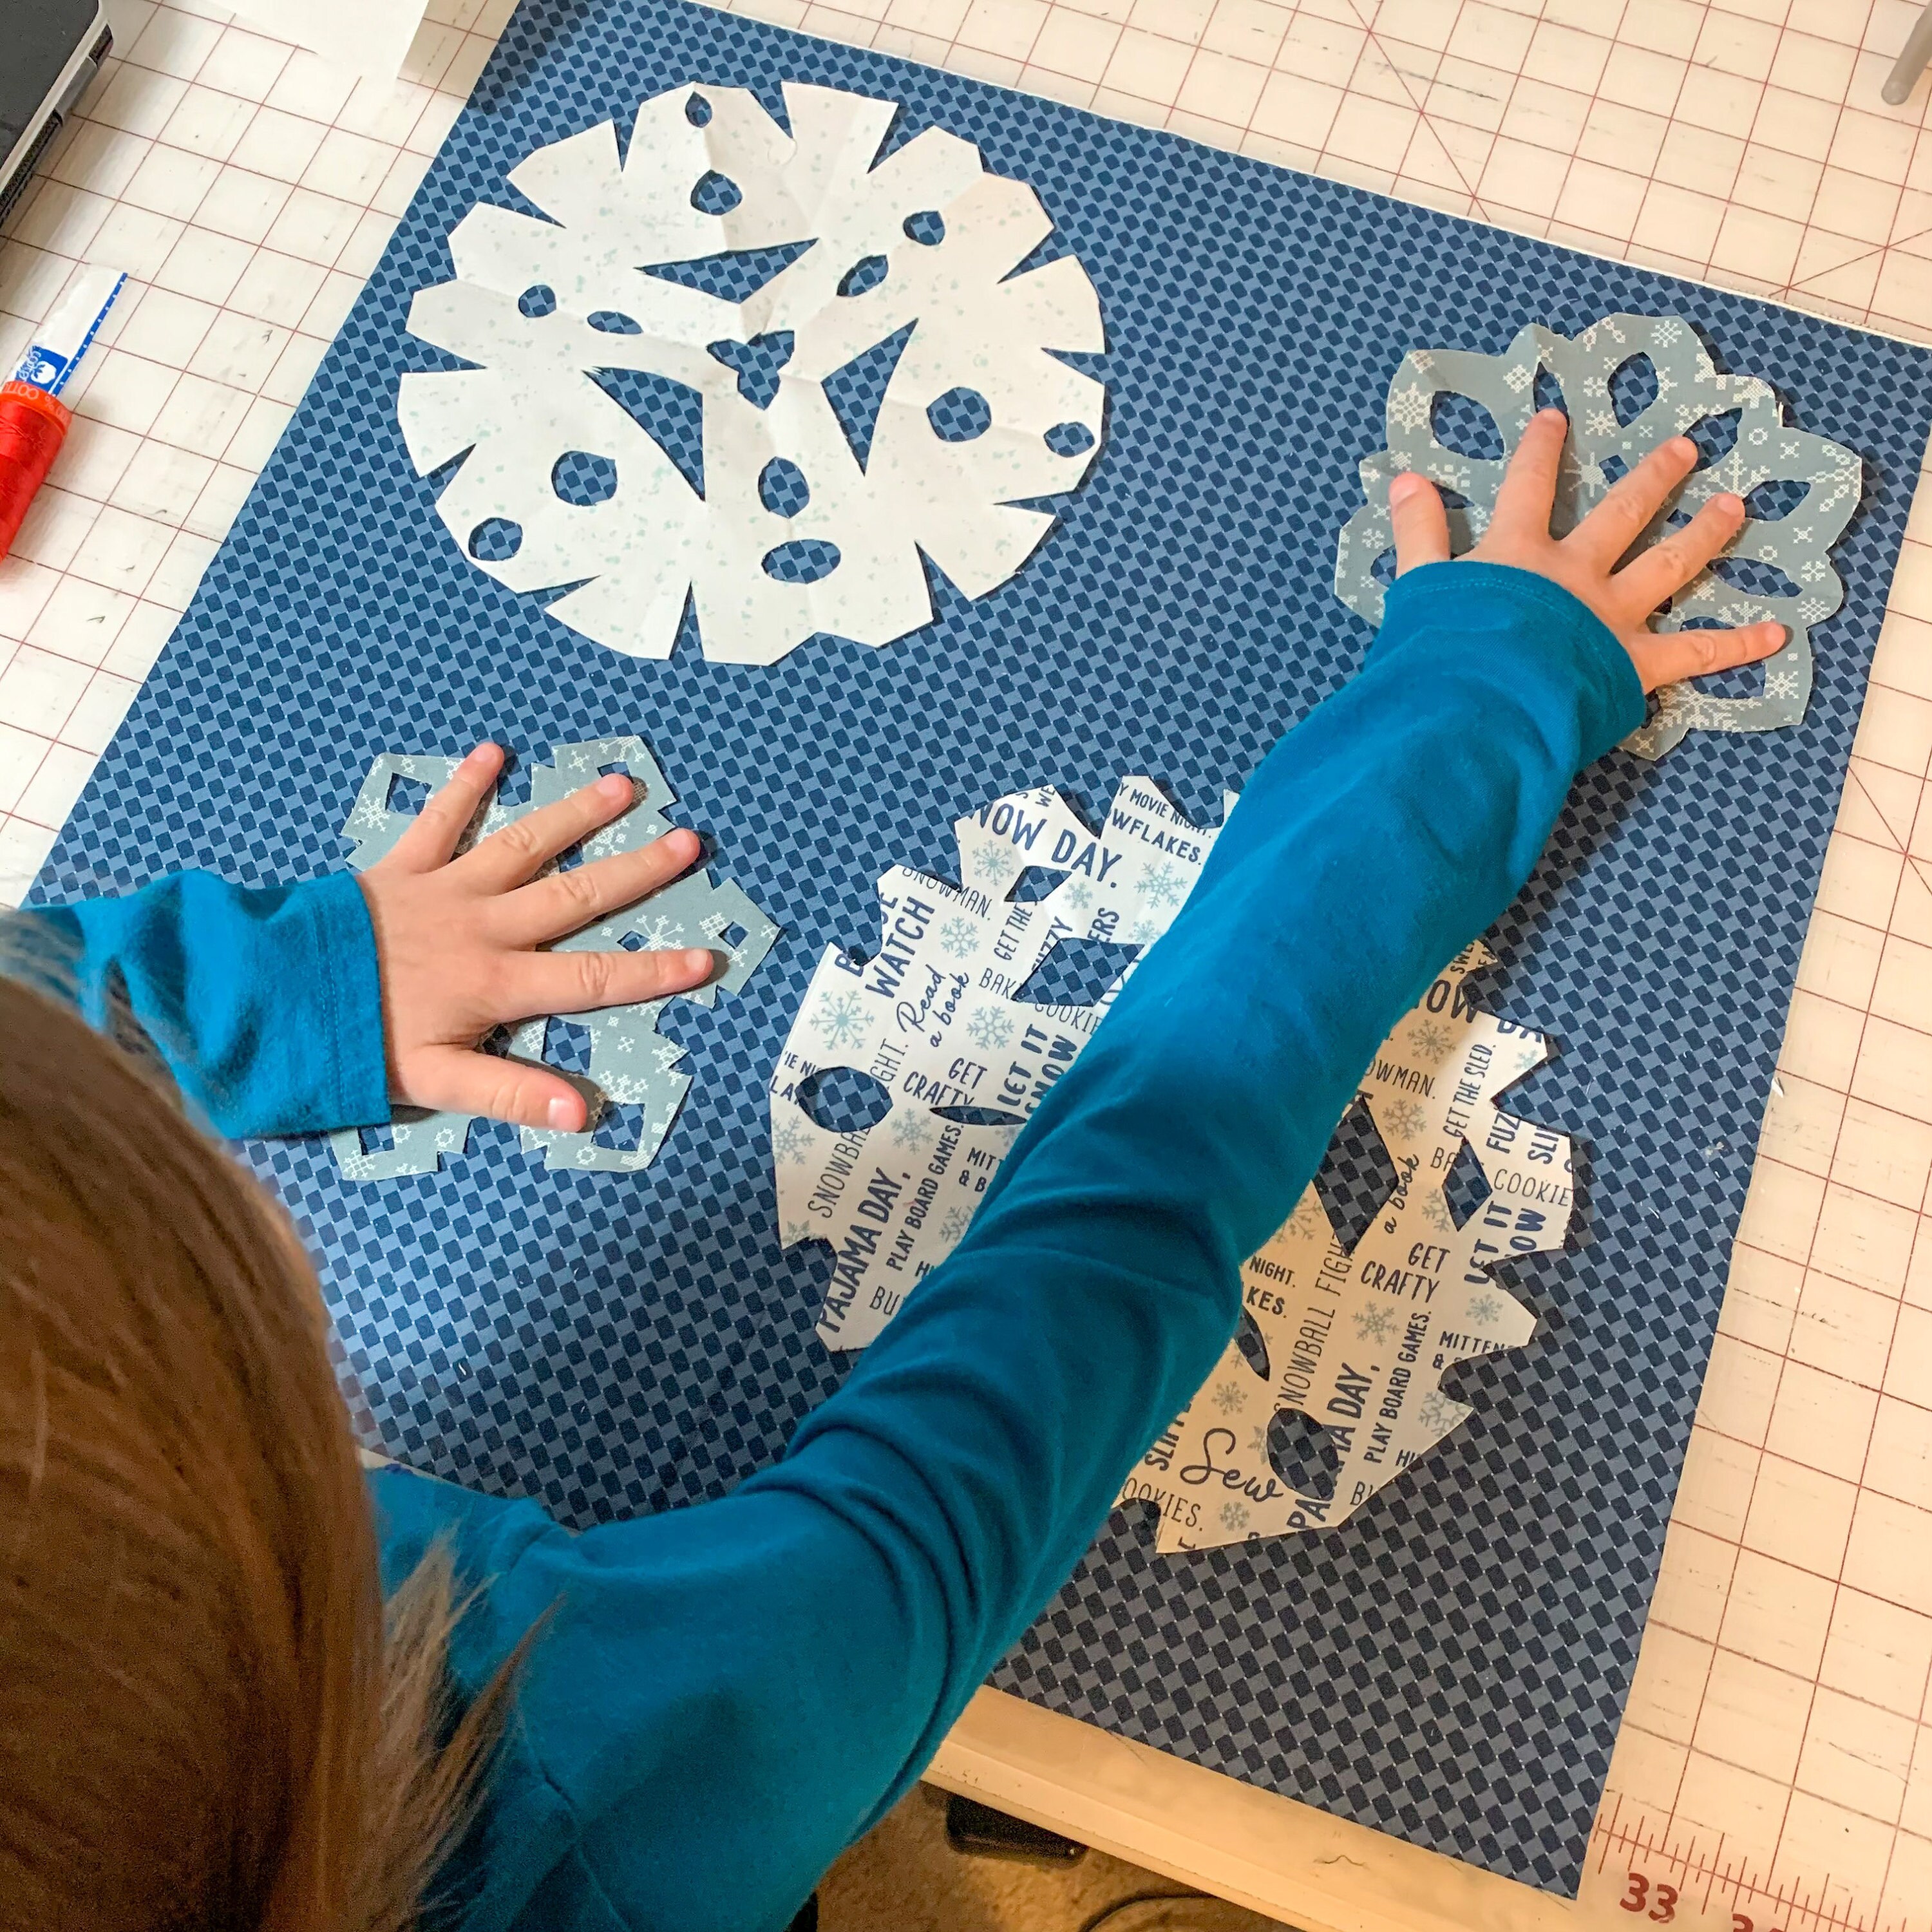
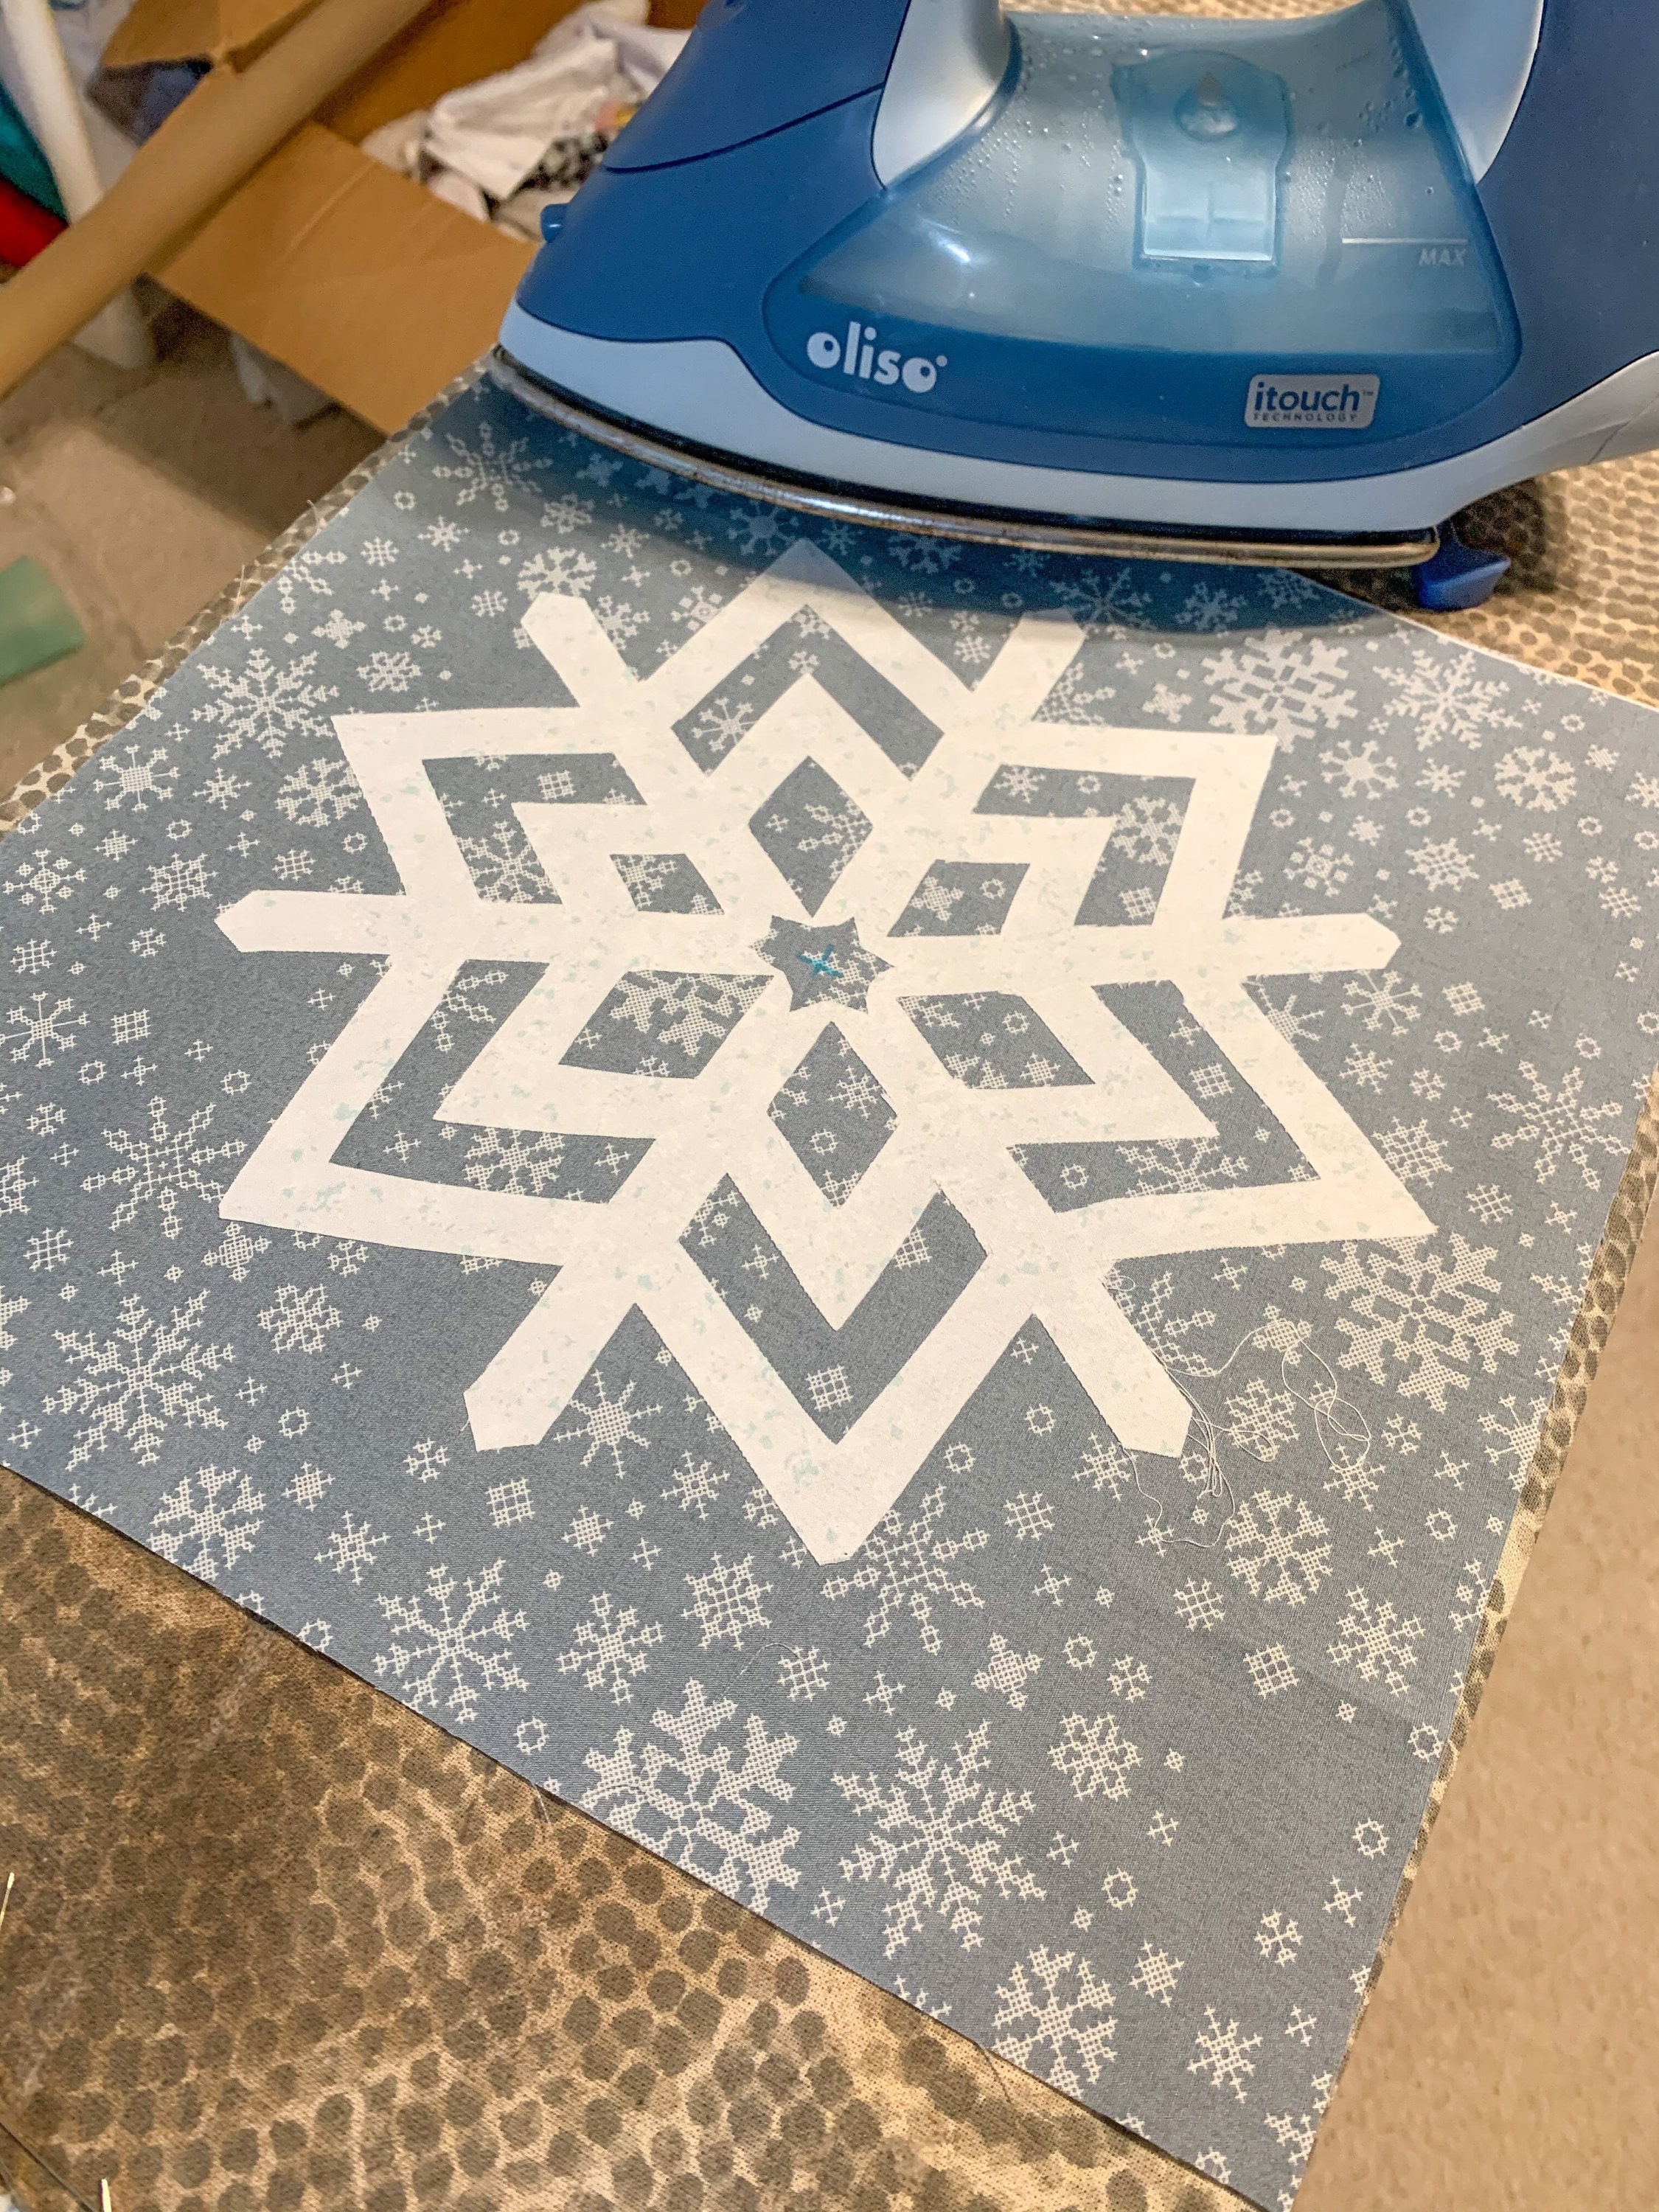
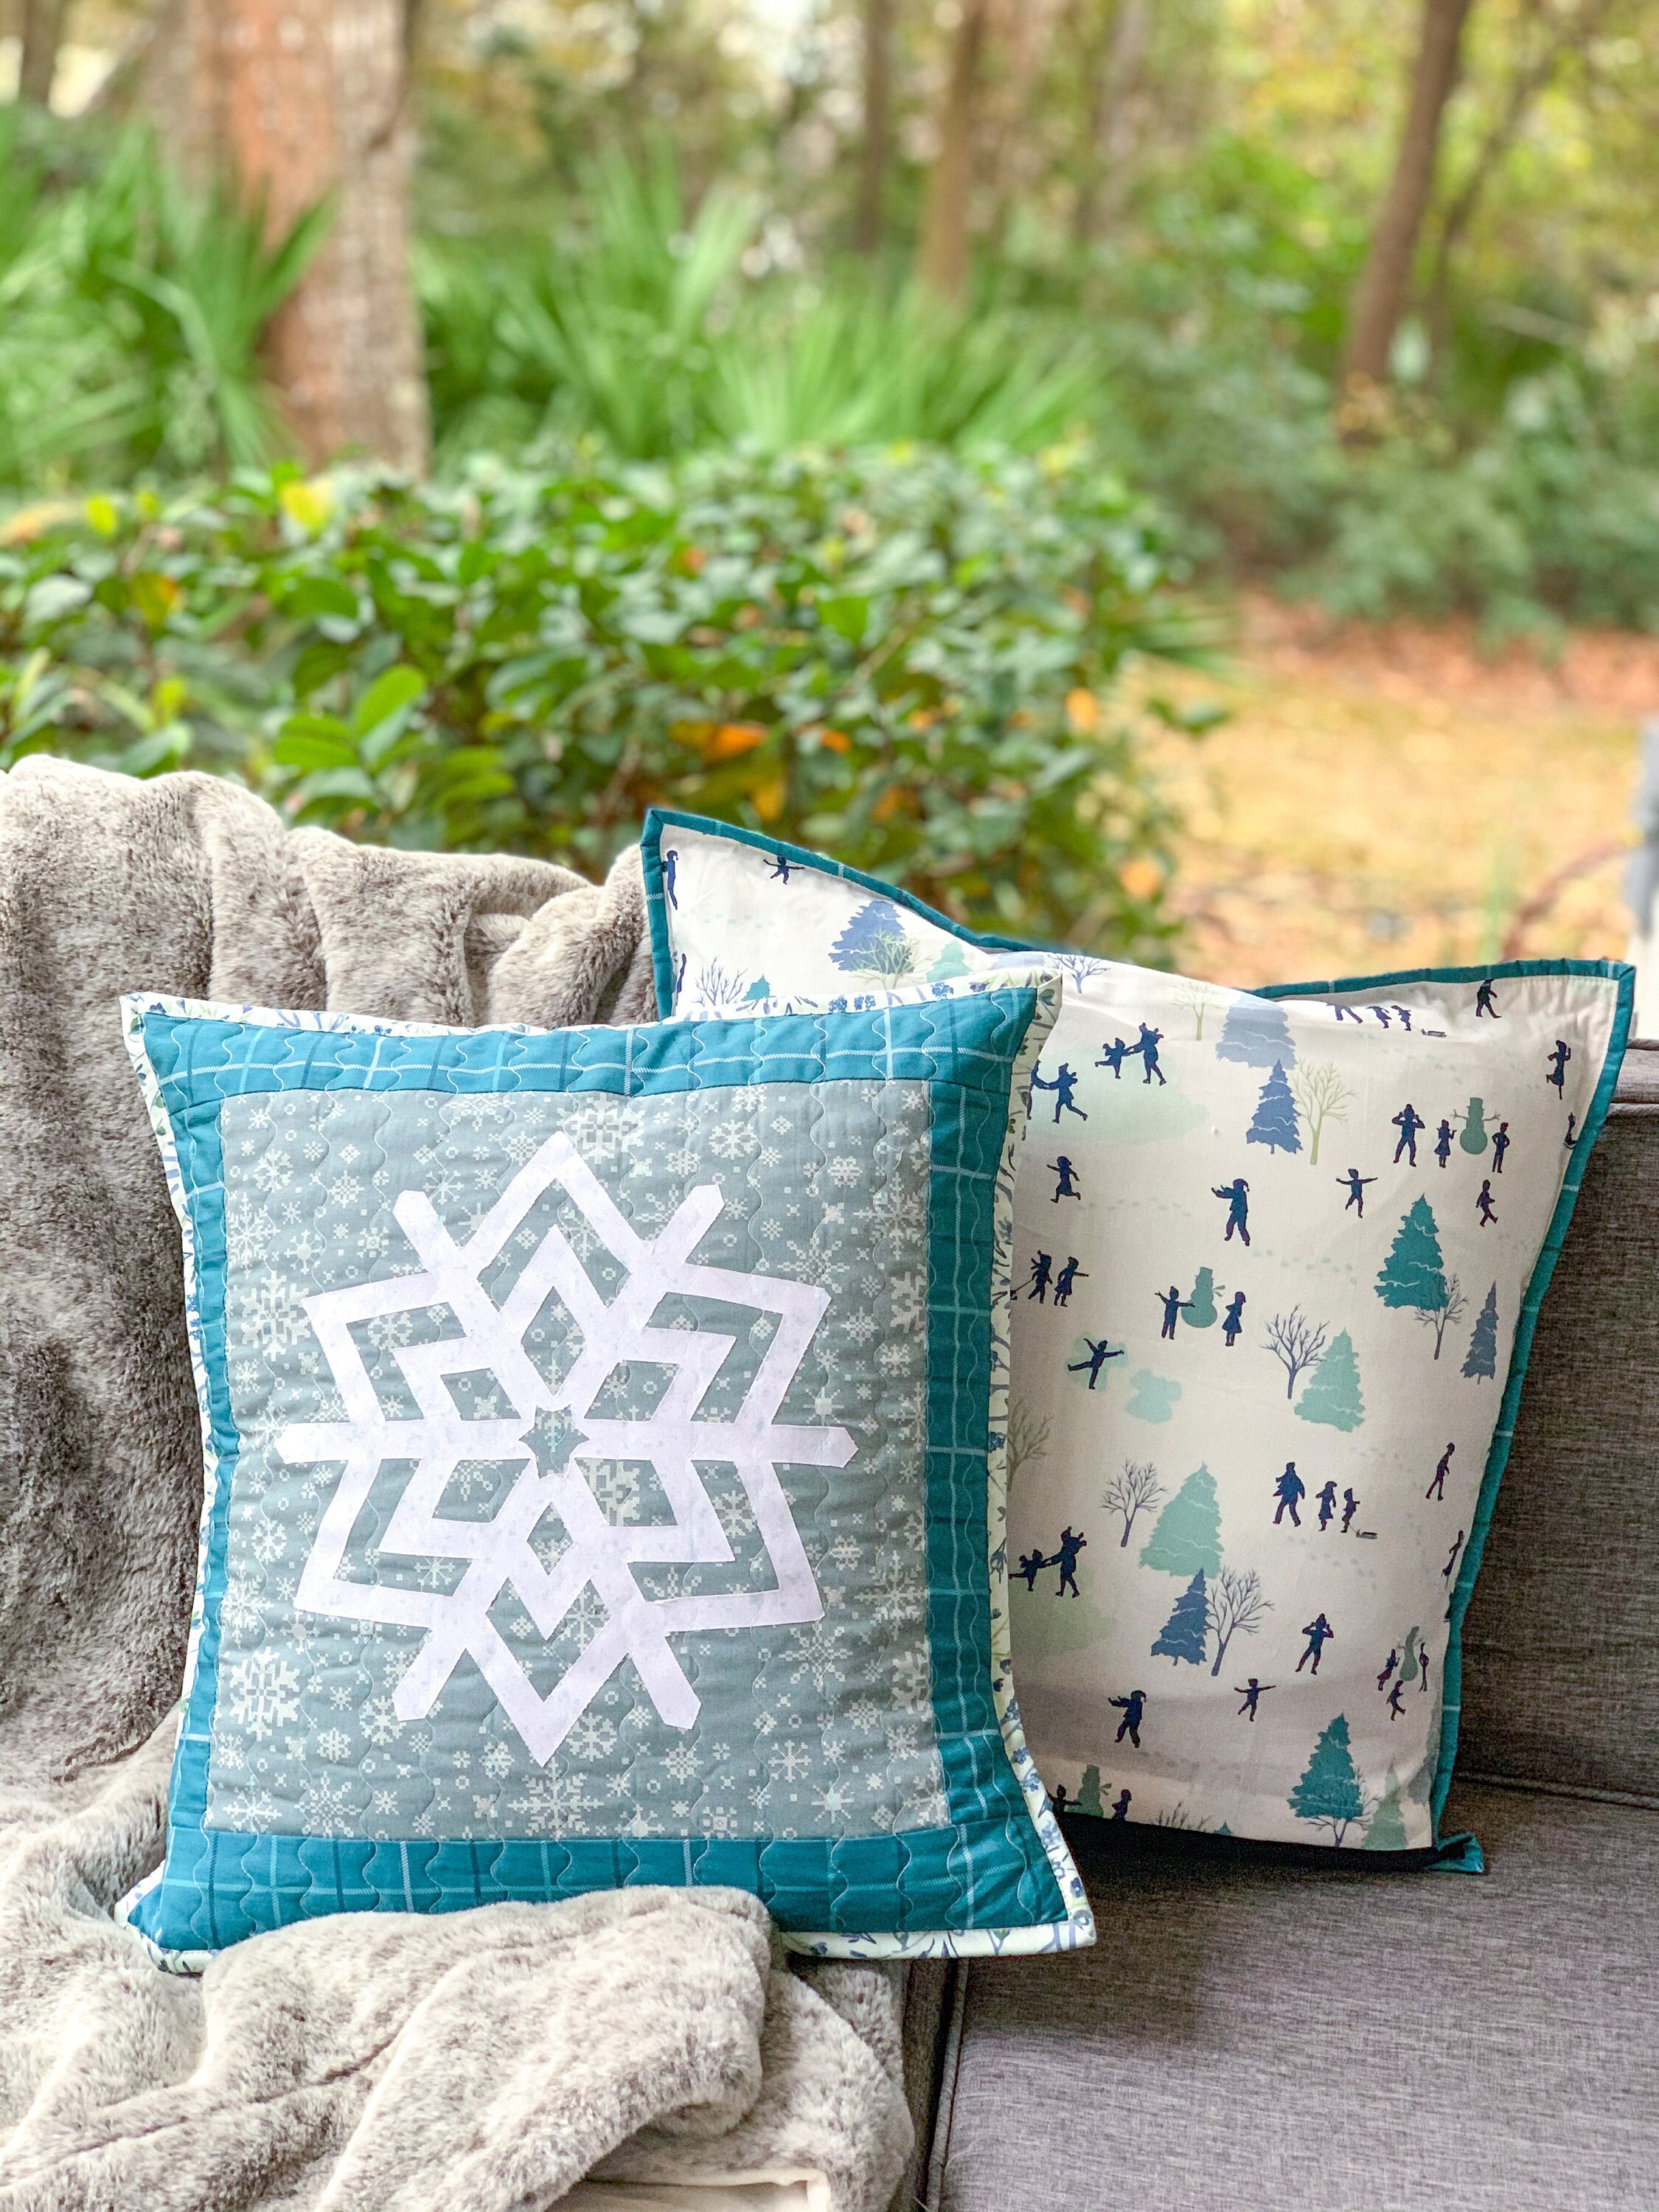
Once we had our snowflakes cut out, we removed the paper backing and placed them where we wanted them to be on our background fabrics, then ironed them in place. Voila! Easy peasy. I chose to then layer in some batting and quilt the pillow fronts. I used Aurifil thread 50wt #2311 Muslin and followed the basket weave pattern on the background fabric for the quilting on Phoebe’s pillow. I quilted simple wavy lines on mine. Last step was a couple of envelope backs and some binding! Phoebe chose the Wintery Check Soft print for binding her pillow, and I chose (my favorite of the collection,) Winter Frost.
Oh, and how perfect is the Building A Snowman print for the backside of the pillows? Phoebe had so much fun reinacting what all the kids in the print were doing.
This was a perfect project for us to do together! Phoebe hasn’t really got the hang of machine sewing yet, so this was a great way for her to still be super involved and stay interested. And let me tell y'all - she is SO stinkin’ proud of her finished pillow! She legit asked me to “post it all over the internet.” It’ll be a great keepsake for us to put out every winter. Maybe I’ll embroider her name and the year on the back side for posterity. I think I’ll do that.

(P.S. I know all the green in my yard doesn't exactly scream "WINTER SNOW!" but alas, we just don't get much of a winter here in Coastal Georgia. Sigh...)